|
|
|
|
|
|
|
|
|
|
 |
|
|
|
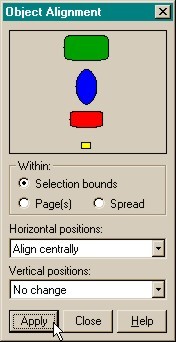
STEP 2 When you have your
ellipses sized, select all four either by holding down the Shift key and clicking on each ellipse, or by dragging a rectangle around all four ellipses with the Selector Tool
(the arrow pointer). (Dragging a rectangle to multiple select is known as Marquee selection)From the Arrange menu, select Alignment to open the Object Alignment dialog. From the
Horizontal Positions drop down list, select Align Centrally and press Apply. |
|
|
NOTE: Adobe Illustrator
users: Unlike Illustrator, you have to marquee select the entire object not just a portion of the object to select it. |
|
|
 |
|
|
|
|
|
|
|
|
|
STEP 1 Using the
Ellipse Tool, draw four ellipses to the sizes and positions shown on the left.Draw the ellipses to the approximate size and shape and then with the individual ellipse selected, select the Ellipse Tool
(if it is not already selected). The Width and Height options will appear on the Infobar and you can highlight each dimension (shown in red) and change it to the dimensions shown here for each ellipse.
The vertical spacing is not critical. |
|
|
 |
|
|