|
Advanced Tutorial
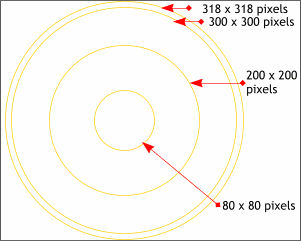
This tutorial builds upon the techniques covered in the new user tutorial. Because of the space I'm going to give you the shorthand version. Here is a more accurate way to create the lamp and table. Using the Ellipse Tool create four ellipses to the sizes shown. I'm using
pixels for measurement. In the Page Options menu, (Utilities) select the Units tab and change the Units to Pixels. In the Grid and Ruler tab set the Major Spacing to
100pix (type it exactly like this) and the Number of Subdivisions to 10. Click Apply and close the dialog. Using the Ellipse Tool create four ellipses to the sizes shown. I'm using
pixels for measurement. In the Page Options menu, (Utilities) select the Units tab and change the Units to Pixels. In the Grid and Ruler tab set the Major Spacing to
100pix (type it exactly like this) and the Number of Subdivisions to 10. Click Apply and close the dialog.
|

