
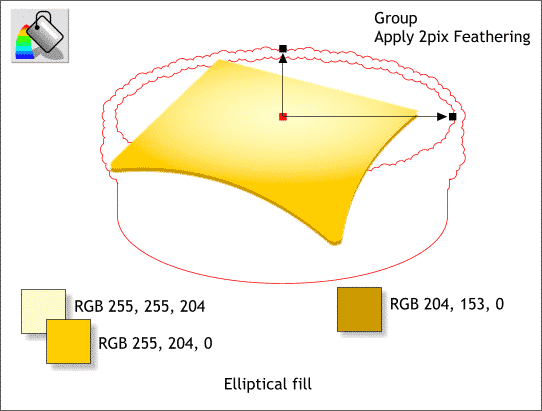
The official color for the edge is the gold color shown on the right. Select the cheese shape with the Fill Tool and apply an Elliptical fill using the two colors shown on the left (the lighter yellow in the center and the golden yellow on the outside). Press the Profile arrow on the Infobar and apply a Profile 2 preset. This expands the center of the fill outwards to extend the pale yellow highlighted area towards the edge. (Food stylists use a small blow torch to melt the cheese).
Remember I am using outlines to keep the file size smaller, you do not need to do this. Create two ellipses to the sizes and position shown. These will become a slice of tomato. Copy the top ellipse to the clipboard (Ctrl c ). Select both ellipses and Combine Shapes... Add Shapes. Delete the inside points with the Shape Editor Tool to make the sides straight (refer to Page 1 if you have already forgotten how to do this). Paste the copied ellipse from the clipboard back on top (Shift Ctrl v).
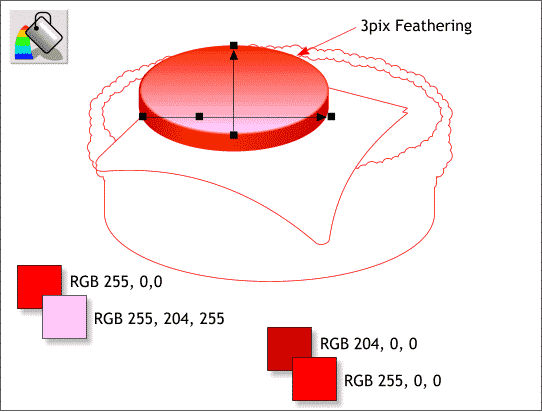
Select the top ellipse and apply a Linear Fill using the colors shown on the right. Select the larger ellipse and apply a Linear fill. Double click on the fill path arrow to add an additional color station. The deep red goes on each side the bright red to the left of center. Apply 3pix of Feathering to the top ellipse.
NOTE: You probably know this, but in case you are a new user and are wondering how to make fills vertical, horizontal or angled, just drag the box on either end of the fill path arrow. Hold down the Ctrl key to constrain the angle.
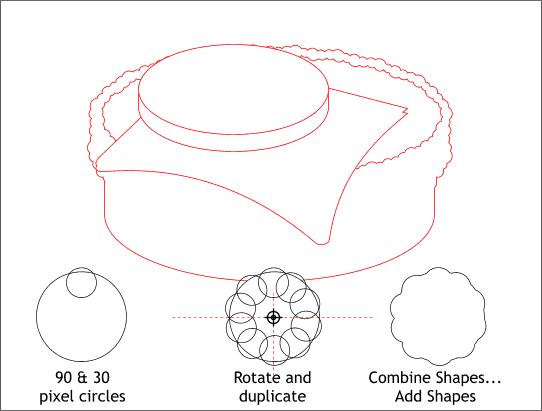
The pickles come next (no self-respecting burger should be without Dill Pickle slices). Draw a 90 pixel circle and a smaller 30 pixel circle. Position and center the smaller circle as shown on the bottom left.
Drag guidelines from the screen rulers (Ctrl L) through the center of the larger circle. Click twice on the small circle to enable rotate/skew mode and then drag the center of rotation bulls eye to the intersection of the two guidelines. Drag one of the rounded corner handles to rotate the small circle. Without releasing the left mouse button, click the right mouse button to drop a duplicate. Repeat this and add more small circles until you have circles all around as shown in the bottom center. Select all the circles and Combine Shapes... Add Shapes.
|
|
|
|
|
|
|
|
|
|
|
|