
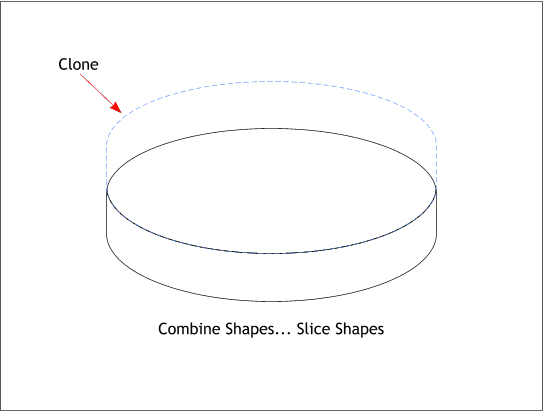
Clone the shape (Ctrl k). Move the clone upwards until the bottom of the clone aligns as shown. Select both shapes and Arrange > Combine Shapes... Slice Shapes . This creates two separate shapes from the combined shape. The cloned shape disappears (shown in blue dashed line).
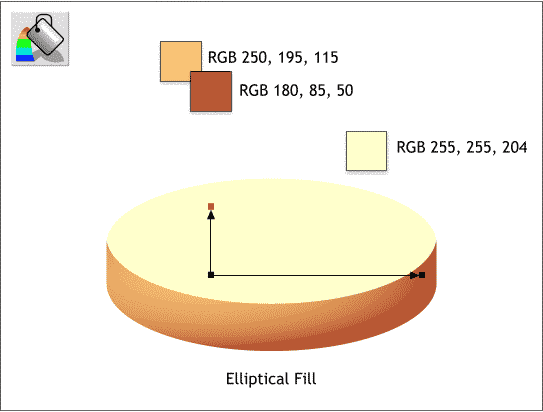
Select the top ellipse and apply a pale yellow fill. Select the bottom shape and apply an Elliptical fill (select the shape with the Fill Tool, then select Elliptical from the drop down list of Fill Types on the Infobar). Drag the center of the elliptical fill upwards and to the left as shown.
To mix the RGB colors shown above, open the Color Editor (Ctrl e or press the color wheel icon to the left of the screen palette). Select RGB Color Model from the drop down list of color models. Enter the first number in the R text entry box, the second number in the G text entry box and the last number in the B text entry box. (RGB stands for Red, Green and Blue, the three primary colors).
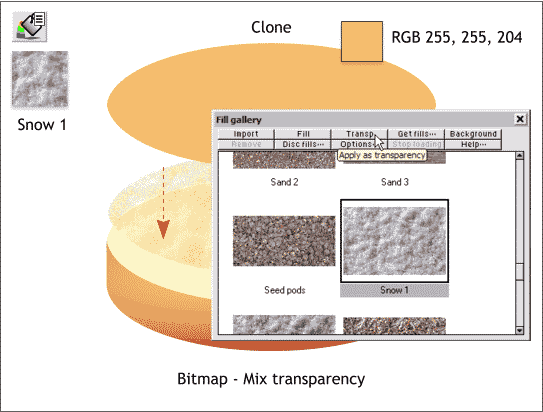
Clone (Ctrl k) the pale yellow ellipse. Change the fill to the pale orange color using the RGB values shown above.
Open the Fill Gallery (at the top right area of the Infobar) then open the Earthy Fills folder. Near the bottom of the contents, select Snow 1. Press the Transp . button. This will apply the snow texture as a transparency.
NO FILLS? If you are a new user and have not installed the Fills on your computer here is what you need to do. Place the Xara X CD in your CD drive. In the Fill Gallery dialog, press Disc Fills... Xara will attempt to locate your CD drive. Once it does double click on the Fills folder then press Add. Xara will ask if you want it to Index the fills. Indicate this is OK and you are in business. Xara will create small thumbnail images of all the fills. The actual fill remain on the CD.
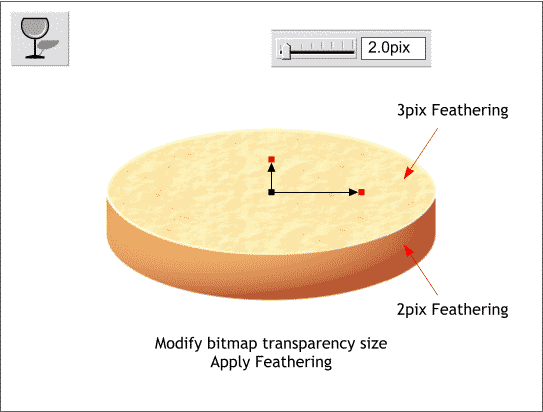
Select the ellipse with the Transparency Tool. Adjust the two arrows (control handles) by dragging the squares on the ends of the arrows towards the center until the texture of the bread looks more like bread. Add feathering to the top ellipse and the bottom shape using the Feathering slider which is found on the top right side of the Infobar.
|
|
|
|
|
|
|
|
|
|
|
|