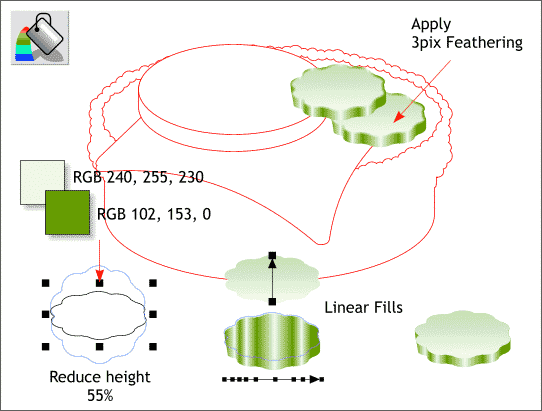

Select the shape and reduce the height to about 55% by dragging one of the top middle or bottom middle control handles (the black boxes) towards the center. Clone the shape and copy it to the clipboard. Using the same procedure that we used to create the tomato, and bun, combine the two shapes and make the sides straight. Paste the copy on top.
Apply a two color Linear fill to the top shape. Select the bottom shape, double click many times to add additional color stations and alternate the two colors to create highlights as shown bottom right.
TIP: You can move the color stations with the Fill Tool cursor. You can also select and nudge the control points using the arrow keys on your keyboard. Press Tab to toggle from one color station to the next.

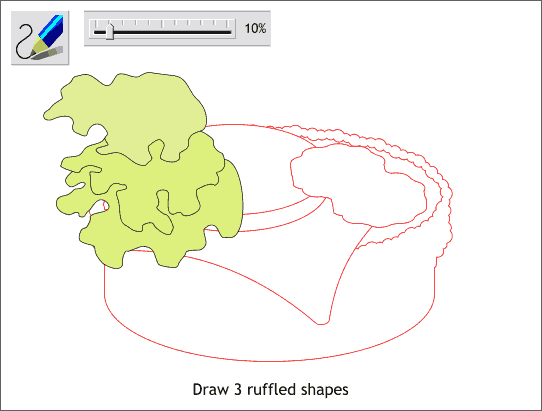
Last we will add some pieces of lettuce. Select the Freehand and Brush Tool. Move the Smoothness slider on the left side of the Infobar to about 10 to allow more accurate drawing. Draw three shapes with very scalloped edges as shown and placing the last end of the line over the start to create a filled shape.
TIP: If you fail to connect the ends of the shape (the shape will fill black if you have created a filled path). Select one of the ends with the Shape Editor Tool then press Enter. Xara will connect the two ends with a straight line creating a closed path. If a path is not closed, you cannot apply a fill.

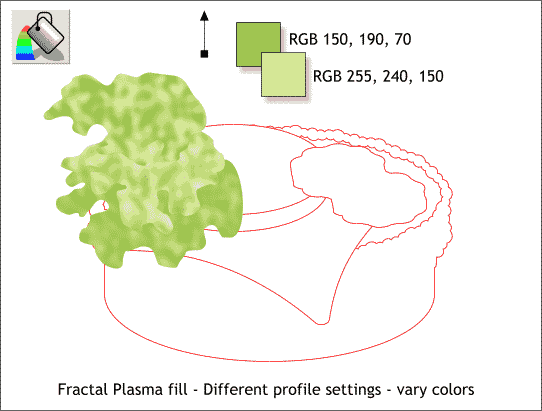
Apply a Fractal Plasma fill to the lettuce leaves using the two colors shown. Vary the Profile settings and the colors slightly to give each leaf a slightly different look.
|
|
|
|
|
|
|
|