|
Mouth watering burgers revealed
In my days in advertising, I had many occasions to work with professional photographers who specialized in photographing food. These photographers relied heavily on food stylists whose job it was to prepare food using every trick in the book to make the food look fabulous for the camera. If you have ever wondered why the hamburger you get at McDonald's never looks one tenth as good as the one you see on the billboards or TV commercials, it is because the one you purchased was not constructed by a food stylist.
Those sesame seed covered buns were baked especially for the photo shoot and the stylist added each seed by hand with a tweezers. In fact she probably created a half dozen "hero" buns. The grill marks on the meat
were added with an electric iron. Glycerin is brushed onto the meat to make it look "juicy" and tiny droplets of glycerin are individually placed on the leaves to make them look fresh and crisp. Those crisp pieces
of fresh lettuce have been individually selected from a table filled with pieces of perfect lettuce leaves. There are dozens of other tricks used in the photography of food and beverages. These are just a few.
In this tutorial, we'll build a burger from the ground round up.
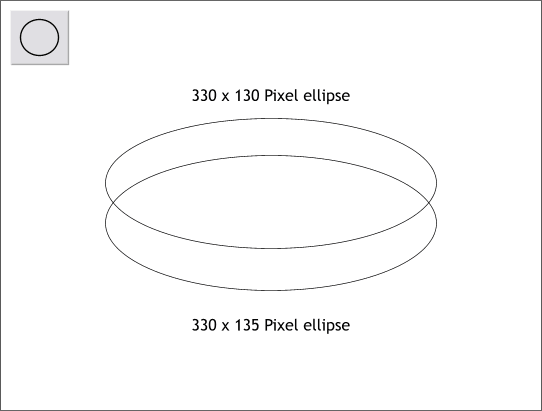
Using the Ellipse Tool, create two ellipses to the sizes shown. Center and space the ellipses as shown.
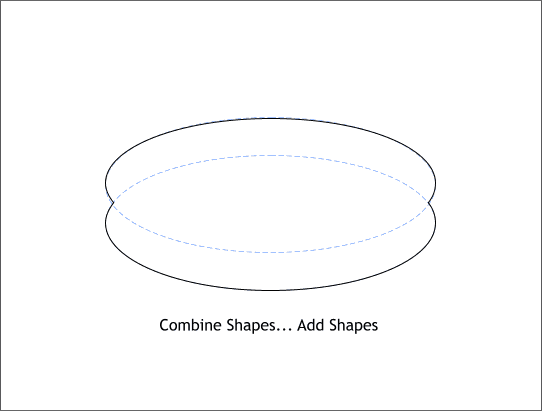
Select both ellipses and from the Arrange menu, select Combine Shapes... Add Shapes. This creates one continuous outline of the two ellipses. (The blue
dashed lines indicate the two ellipses before they were combined).
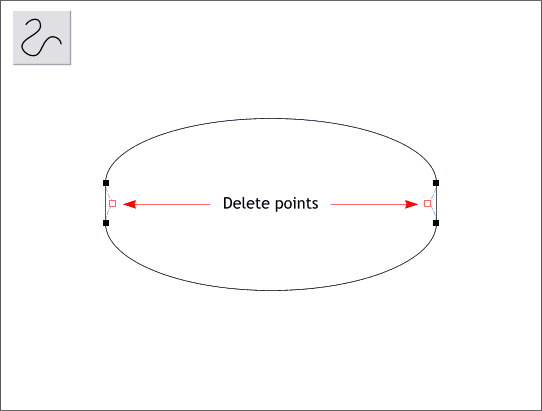
With the combined shape still selected, select the Shape Editor Tool from the main toolbar. Select the control points indicated in red, and press the Delete key on your computer keyboard.
TIP: You can also right click on the points and select Delete Point from the pop up menu.
|