
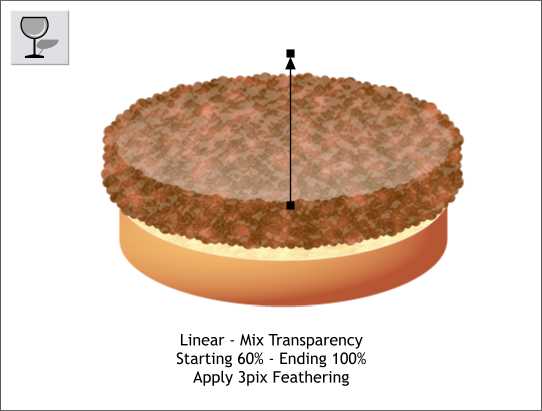
Select the white shape with the Transparency Tool. Click and drag from the bottom center towards the top as shown. Click on the starting control handle (the box at the beginning of the arrow) and move the Transparency slider on the Infobar to 60% so the starting transparency is not so opaque. Move the Feathering slider on the top right of the Infobar to 3pix to soften the edges. Looks pretty juicy, don't you think?
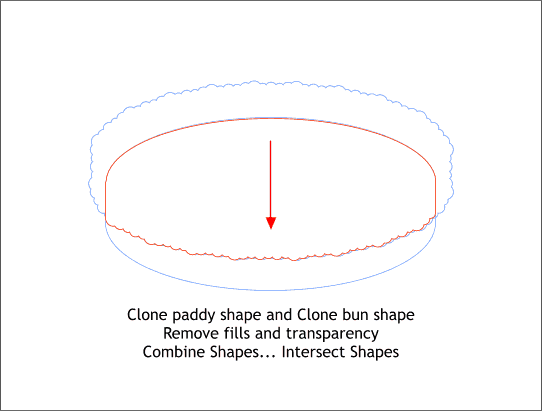
NOTE: I will be showing different finished elements of the drawing in outline form to keep the file size for the whole tutorial as small as possible with this many images.
Clone the patty and the bun shapes (Ctrl k). Remove all transparency and feathering and delete all except the two shapes shown above in blue outline.
Move the patty shape downwards as shown. Select both shapes and Arrange > Combine Shapes... Intersect Shapes. This eliminates all except the shape shown in red outline.
TIP: You can also access the Combine Shapes commands by right clicking on the selection and selecting Combine Shapes... from the pop up menu.
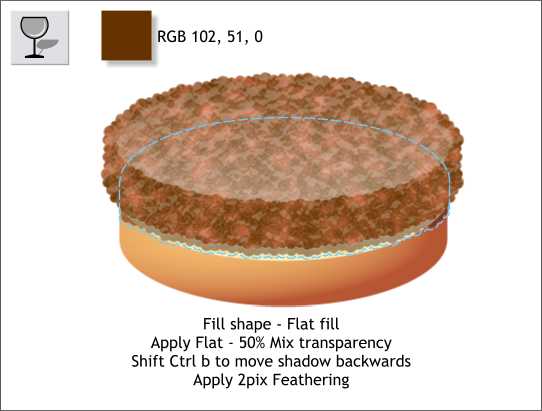
Select the intersected shape and apply a dark brown fill using the RGB values shown. Apply a Flat, Mix, 50% transparency and then apply 2pix of Feathering. Position the shape as shown (actually move it further down so that it covers the top part of the bun) and then press Shift Ctrl b repeatedly until the shadow has moved behind the hamburger patty. (Shift Ctrl b ((or Shift Ctrl f)) moves the selection up or down a layer at a time)
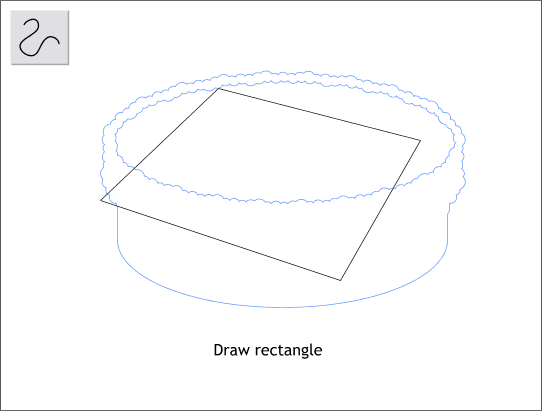
Using the Shape Editor Tool, draw a rectangle as shown clicking the last control point over the first and creating a closed path. Your shape will be black indicating a closed path. Change the fill to none by clicking the left mouse button on the crosshatched box to the left of the screen palette (right clicking changes the outline to none).
|
|
|
|
|
|
|
|