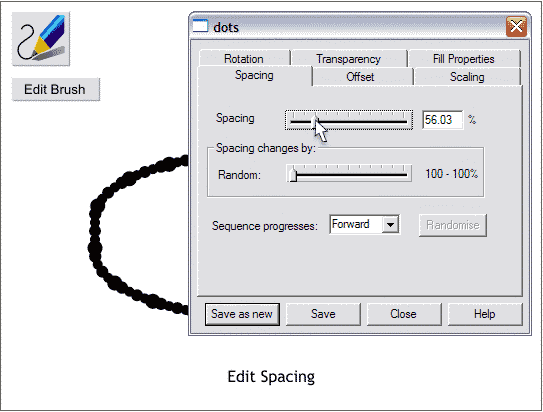

Select the stroked outline with the Freehand and Brush Tool then press Edit Brush on the Infobar. In the dots edit stroke dialog, adjust the Spacing slider until it reads around 55. Press Save and close the dialog. This is more the shape of a hamburger patty.

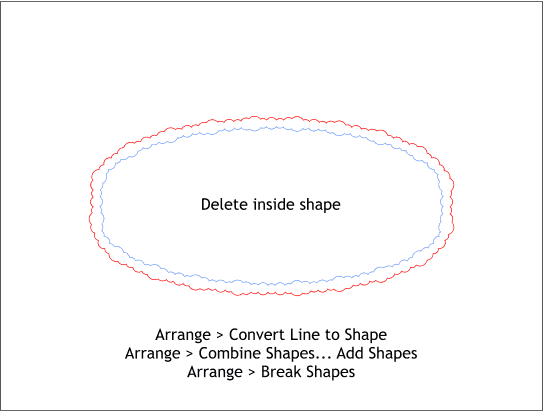
With the stroked outline selected, open the Arrange menu and select Convert Line to Shape. Open the Arrange menu and this time select Combine Shapes... Add Shapes. Open the Arrange menu once again and this time select Break Shapes. Delete the inside shape (shown in blue outline). It will be easier to see the two shapes if you add an outline and send the top shape to the back (Ctrl b).

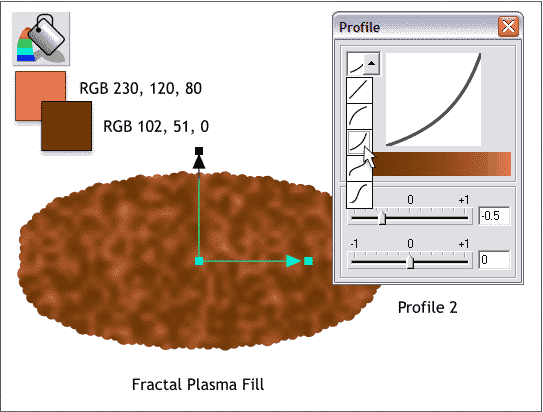
Select the Fill Tool then click the shape to select it. From the drop down list of Fill Types on the Infobar, select Fractal Plasma. Adjust the control handles as shown and change the two colors to the two shown above. Click the Profile arrow on the Infobar and select Profile 2 from the drop down list of Profile presets. This more or less has the look of a cooked burger.
CHANGING COLORS: To modify the colors click on either of the squares on the end of the arrows to change the outside color and enter the RGB color values in the Color Editor ( Ctrl e). Select the center square where the two arrows come together and change the color to the second color shown above.
|
|
|
|
|
|
|
|