
Select the Bevel Tool then click on the smaller of the two circular shapes to select it. Drag any of the control handles (the red arrows) towards the center to create an Inner Bevel. From the drop down list of Bevel Types on the Infobar, select Rounded. From the drop down list of Slider Types on the Infobar, select Size. Change the size to 12 and press Enter to apply the change.
Select Light Elevation from the drop down list of Slider Types. Change the Light Elevation setting to 30 degrees.
Drag the Light Angle arrow (the arrow in the center of the bevel) until it is pointing straight up as shown above).
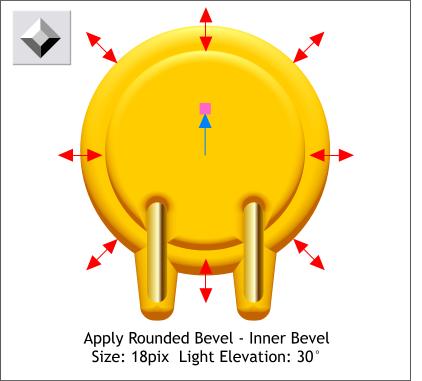
With the Bevel Tool, click the larger circular shape to select it. Drag any of the red arrows towards the center a little bit to change the bevel to an inner bevel. Select Rounded from the drop down list of Bevel Types on the Infobar. Select Size from the Slider Types drop down list on the Infobar. Change the Size setting to 18 and press Enter to apply the change. Reduce the Light Elevation slider setting to 30 degrees and press Enter once more to apply the change. Drag the Light Level arrow until it is pointing straight up.
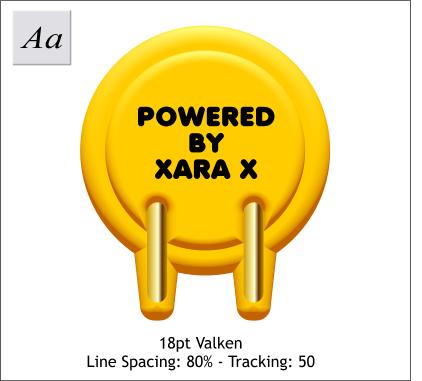
Using the Text Tool, click inside the shapes and key in POWERED BY XARA X. I have used the font Valken which is on the Xara X CD in the Fonts folder.
Change the size to 18pt by selecting this from the Size drop down list. On the Infobar, reduce the Line Spacing setting to 80% (to close up the space between the lines of text). Increase the Tracking setting (the space between the letters) to 50 to add a little more space between the letters.
Save your work and take a short break.
|
|
|
|
|
|
|
|
|
|
|
|