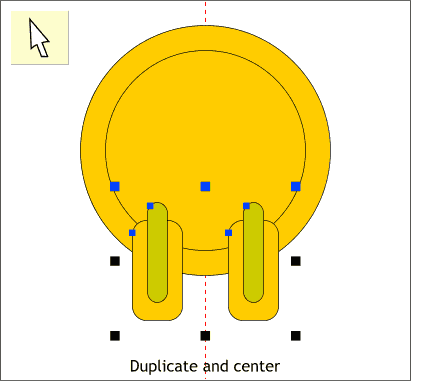

Drag a guideline from the left screen ruler (Ctrl L) through the center of the two circles. (The circles should be centered. Use the Alignment menu (Arrange > Alignment ) to center the circles horizontally and vertically).
Marquee select the two rectangles by dragging a rectangle around them with the Selector Tool. Drag both to the right and before you release the left mouse button, click the right mouse button to drop a duplicate set. If you hold down the Ctrl key when you drag, it will constrain the sideways movement.
Marquee select both sets of rectangles and use the arrow keys on your keyboard to nudge the rectangles one way or the other until the center control handles (the black squares) are aligned with the guide line.
(You could also group all four rectangles and then use the Alignment menu to align the rectangles to the circles. Then ungroup the rectangles).

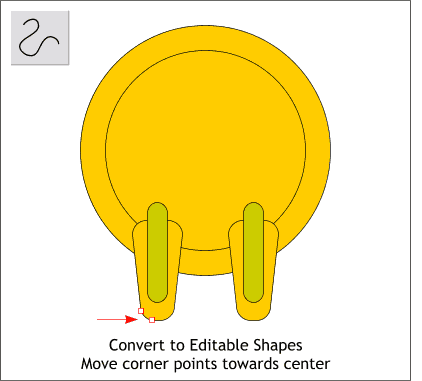
Select the rectangles and from the Arrange menu, select Convert to Editable Shapes. With the left larger rectangle selected, select the Shape Editor Tool. Marquee select the bottom left two control points and use the arrow keys on your keyboard to nudge the two nodes towards the center. Repeat this and nudge the two bottom right control points the same distance towards the center. Repeat this step for the larger right rectangle so your drawing now looks like the illustration above.

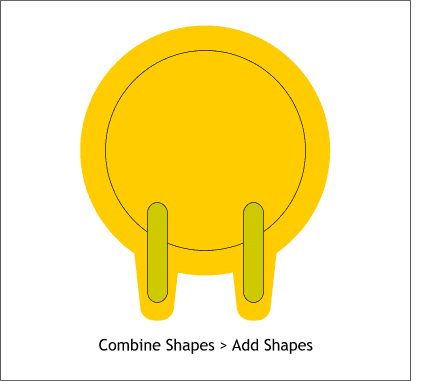
Select the two larger rectangles and the larger of the two circles (hold down the Shift key to select multiple objects).
From the Arrange menu, select Combine Shapes > Add Shapes. This combines the three selected objects into one object with a single outline.
Set the outline to none by either selecting None from the Width drop down list on the Infobar, or by right clicking on the cross hatched box to the left of the screen color palette.
|
|
|
|
|
|
|
|