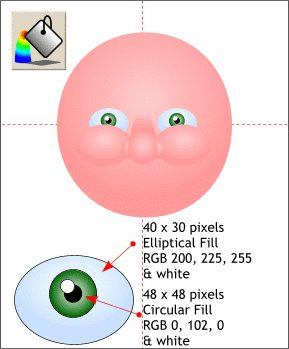
 Make an ellipse 40 pixels wide by
30 pixels tall. Apply a 2-color Elliptical Fill using a very pale blue and white. Make an ellipse 40 pixels wide by
30 pixels tall. Apply a 2-color Elliptical Fill using a very pale blue and white.Make a 48 pixel circle and apply a 2-color circular fill using dark and medium green. Make a smaller circle and apply a
black fill for the pupil and make another smaller white circle for the highlight. Group the eye elements, make a duplicate and place the eyes behind the cheeks. (Bring the cheeks and nose to the front).
NOTE: To create any of the custom colors shown here, click the
tiny color wheel icon to the left of the screen palette to open the Color Editor. Select RGB from the Color Model drop down list and enter the three values. For example for RGB
200, 225, 255, enter 200 for the red value, 225 for the green value and 255 for the blue value. TIP: You can name these colors as you create them and they will be available on the screen palette. Click the tag icon (New Named Color) in the Color Editor
, enter a name for the color, and click Create. |


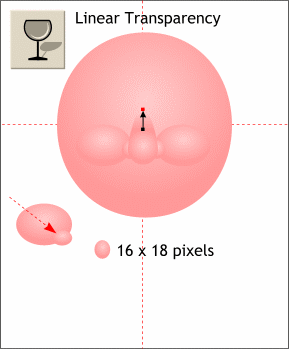 Make yet another duplicate ellipse
and reduce the size to 16 by 18 pixels. Duplicate this and place these on either side of the nose.
Make yet another duplicate ellipse
and reduce the size to 16 by 18 pixels. Duplicate this and place these on either side of the nose.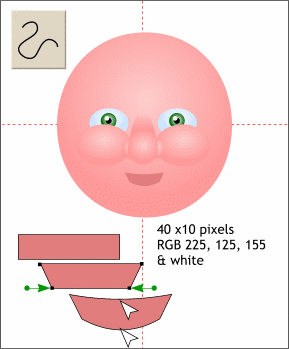 Create a 40 by 10 pixel rectangle. Convert
the rectangle to Editable Shapes (Arrange menu).
Create a 40 by 10 pixel rectangle. Convert
the rectangle to Editable Shapes (Arrange menu).