 |
 |
|||||||
| 0 1 2 3 4 5 6 7 8 9 10 11 Download Zipped Tutorial | ||||||||
|
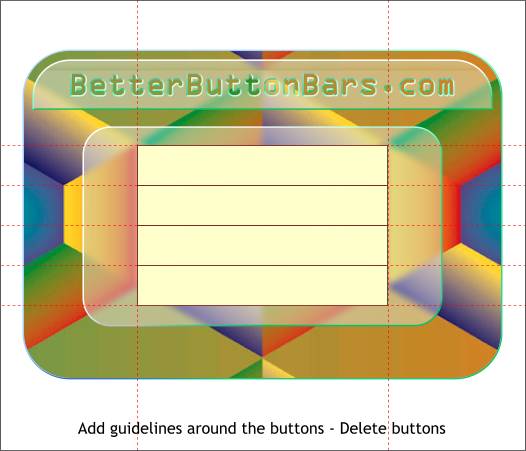
From the screen rulers (Ctrl L to display rulers), drag guidelines onto the page and snap them to the buttons as shown above. Delete the buttons from your page. Marquee select them first and then delete them.
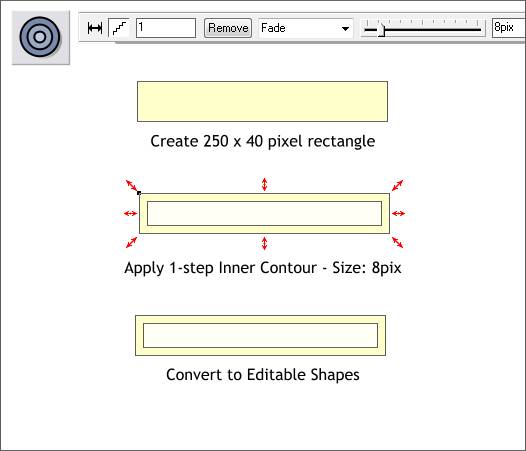
Using the Guidelines, create a new rectangle to the size of one of the buttons. Select the rectangle with the Contour Tool (Ctrl F7) and drag any of the red arrow control handles towards the center to apply an Inner Contour. Change the number of Steps to 1 and press Enter to apply the change. Change the Contour Width to 8pix and press Enter. With the rectangles selected, select Convert to Editable Shapes from the Arrange menu.
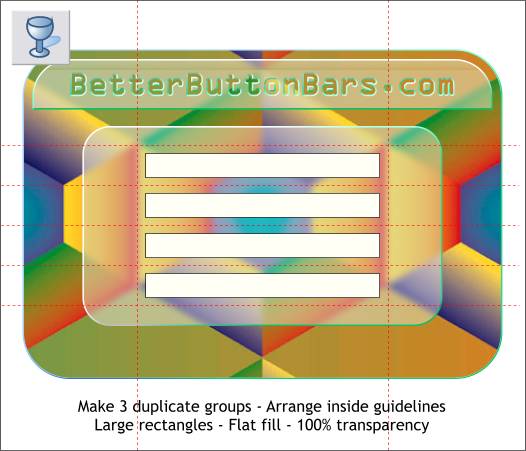
Make 3 duplicates and place the duplicate rectangles within the guidelines as shown above. Select all four groups and Arrange > Ungroup. You many need to Ungroup several times until the Arrange > Ungroup option is grayed out. Select the larger button rectangles with the Transparency Tool (F6) and set the transparency to 100%. This will allow you to select the larger button rectangles but also lets the background show through. Save your drawing and take a short break.
|
||||||||
|
|
||||||||


