 |
 |
|||||||
| 0 1 2 3 4 5 6 7 8 9 10 11 Download Zipped Tutorial | ||||||||
|
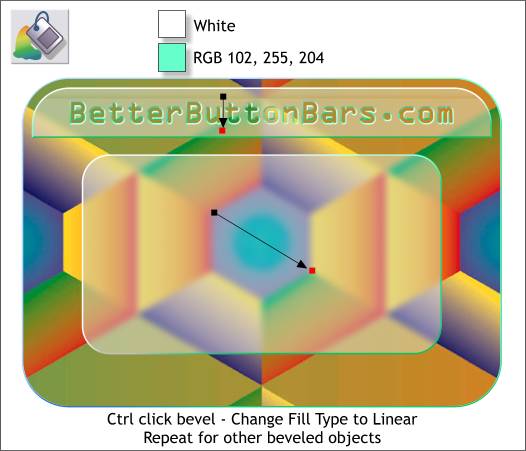
Xara by default includes an object's fill in the bevel. But the beveled part of a beveled object is in fact independent of the object. This means you can change the fill attributes of the bevel. In this next step we will modify the fill for the bevel.
Hold down the Ctrl key and click the Selector Tool on the bevel on the smaller rounded rectangle. If you look to the left of the status bar at the bottom of the screen it should read 1 Bevel on Inside... Switch to the Fill Tool (F5). From the drop down list of Fill Types on the Infobar, select Linear. Drag the start and end fill path handles (the small squares on either end of the fill path arrow) on a diagonal as shown above center. Click the end control handle (shown in red) and change the fill color to the bright aqua color shown. You can also select Spring Green Cyan from the named colors on the screen palette. Select the bevel for the title bar and do the same thing except in this case make the fill path arrow vertical as shown above top. Use the same starting and ending colors. Repeat for the large rectangle.
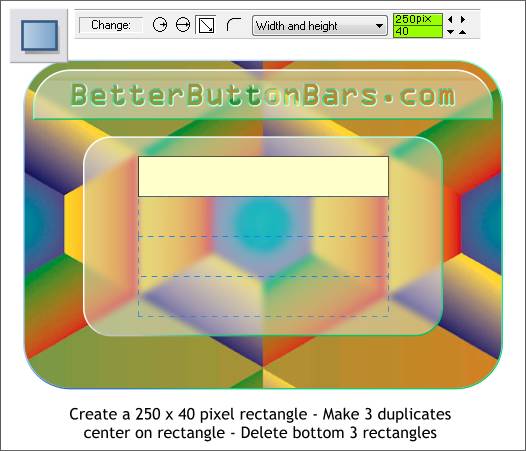
Create a new rectangle to the size shown. Make 3 duplicates and stack and center all 4 rectangles over the smaller rounded rectangle. Delete the bottom 3 rectangles.
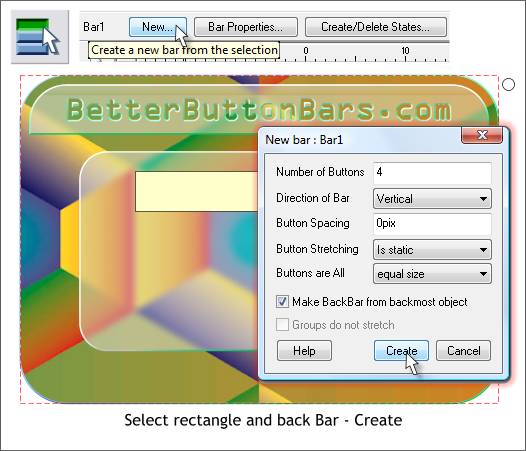
Select everything but the yellow rectangle and group them (Ctrl g). Select the group of button bar objects and the new rectangle. Switch to the Button and Nav Bar Tool (Ctrl F8). Click New... on the Infobar. This opens the New Bar dialog. From the Button Stretching drop down list, select Is Static (the bottons will not stretch). From the Buttons Are All drop down list, select Equal Size. Important: Check the Make Backbar the Backmost Object check box. Click Create.
|
||||||||
|
|
||||||||


