 |
 |
|||||||
| 0 1 2 3 4 5 6 7 8 9 10 11 Download Zipped Tutorial | ||||||||
|
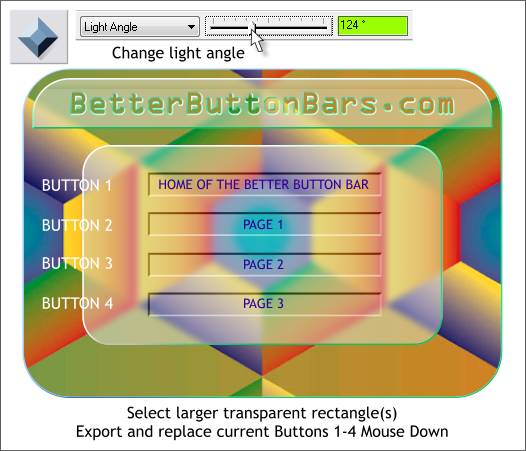
Select all four sliced rectangles, switch to the Bevel Tool (Ctrl F3). Select Light Angle from the drop down list and change the slider setting to about 124 degrees. Now the buttons appear to be going in instead of coming out. One-by-one, export these new buttons to replace the current Mouse Down buttons. This is the button state when the button is clicked.
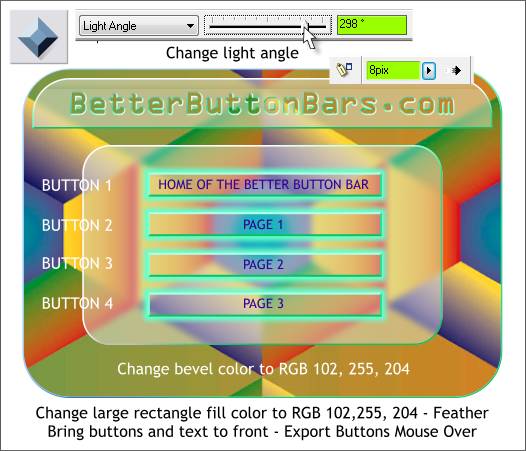
Select the four beveled buttons and reverse the Light Angle as shown. Select the 4 larger rectangles (the ones that are transparent). Set the transparency to none (0%). Apply a solid color RGB 102, 255, 204. With the four aqua colored rectangles selected apply 8pix of feathering using the Change Size of Feather Region slider in the top right area of the Infobar. This softens the edges and produces a glowing effect as you can see.
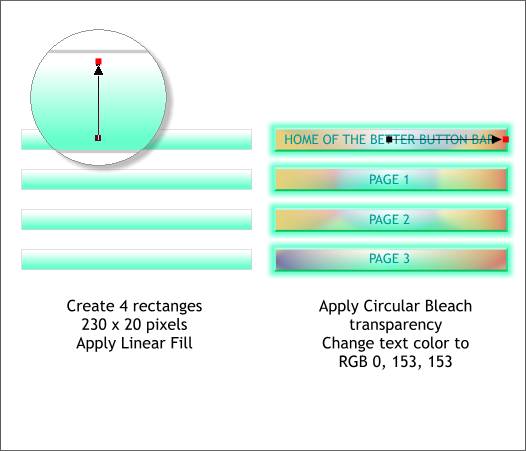
Create a new rectangle 230 by 20 pixels and apply a Linear fill as shown in the enlarged area. The top color is white the the bottom the same aqua color. Start and end the fill in a short distance from the edges. Make 3 duplicates (Ctrl d) and center each over the buttons. Using the Transparency Tool (F6), apply a Circular, Bleach transparency to each rectangle. Select the text (Alt click twice over the text to drill down one layer) and bring the text to the top ( Ctrl f). You can also more the View Quality slider on the Infobar to Outline view and select the text this way. Change the fill color for the text as shown.
|
||||||||
|
|
||||||||


