 |
 |
||||||||
| 0 1 2 3 4 5 6 7 8 9 10 11 Download Zipped Tutorial | |||||||||
|
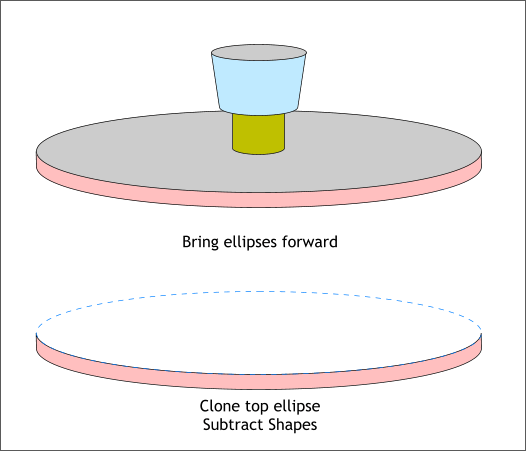
Bring the large ellipse shown in gray to the front (Ctrl f). Clone the large gray ellipse (Ctrl c). Select the clone and the pink combined shape and Arrange > Combine Shapes > Subtract Shapes or press Ctrl 2. This results in the pink shape shown in the second example above. It will look just the same as the above top example except now the non-visible portion of the pink shape is removed. This will be important later on in the tutorial. By the way, these colors are arbitrary and only used to make the operations easier to see. We will change to the final colors later.
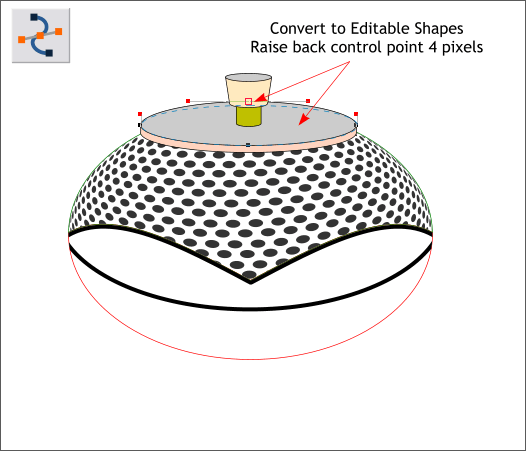
Convert the large gray ellipse to Editable Shapes (Arrange menu). Switch to the Shape Editor Tool (F4). Select the top center control point and using the up arrow key on your keyboard, move it upwards about 4 pixels. The lid on the teapot is slightly curved and this will create that appearance.
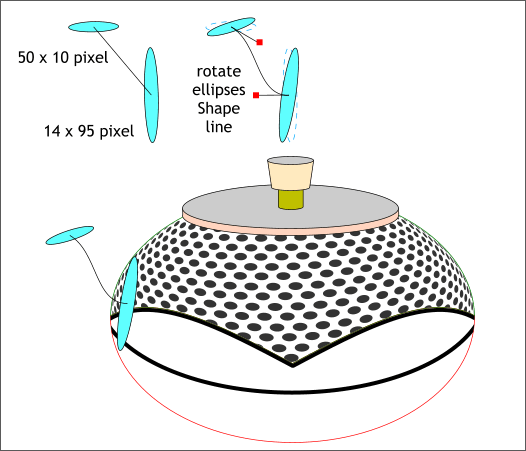
Create two ellipses to the size shown above top left. With the Shape Editor Tool, create a single line starting from the center of each ellipse. Edit the line with the Shape Editor Tool. First drag the line into a curve, then click on the end points to enable the Bezier control handles. Drag these red squares to the positions shown to form an S-shape. Rotate the ellipses slightly as shown top right. Click twice to enable rotate/skew mode and drag any of the corner curved arrows to rotate the ellipses. Place the line and the two ellipses over the oval of the pot as shown.
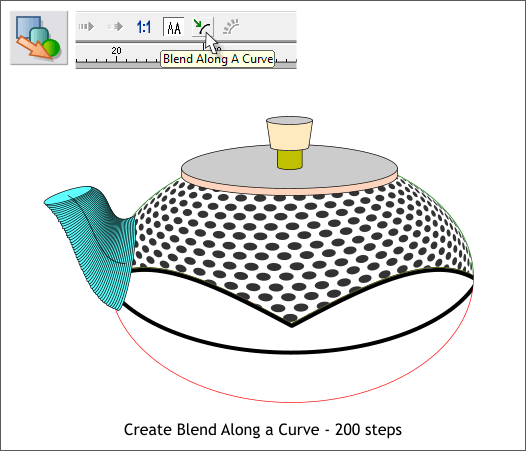
Select the Blend Tool (F7 or W). Drag from the larger ellipse on the right to the smaller ellipse on the left to create a blend. Hold down the Shift key and click on the S-shaped line to select both the line and the blend. Click the Blend Along a Curve icon to place the blend along the path. Increase the number of Blend Steps to 200 on the Infobar and press Enter to apply the change. Set the outline to none.
|
|||||||||
|
|
|||||||||


