 |
 |
||||||||
| 0 1 2 3 4 5 6 7 8 9 10 11 Download Zipped Tutorial | |||||||||
|
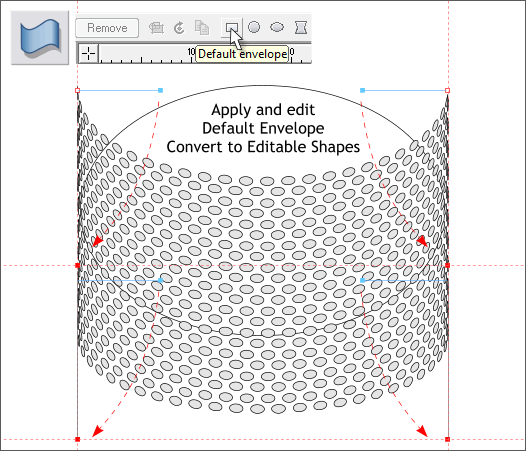
Select the group of circles then select the Mold Tool (Shift F6). Click the Default Envelope icon on the Infobar (the first rectangle icon). Click the top left control point and two small red square control handles appear. Drag the top left red control handle (to the right of the corner control point) down to the left as shown above. Click the top right control point and drag the red control handle down to align with the right side. Repeat this on the bottom two control points. You should get the U-shape show above. It helps to drag a guideline from the screen rulers, (Ctrl L to display screen rulers) through each of the left, or right) control handles and align the small red control handles with one another. When the enveloped shape is how you want it, from the Arrange menu, select Convert to Editable Shapes or press Shift Ctrl s.
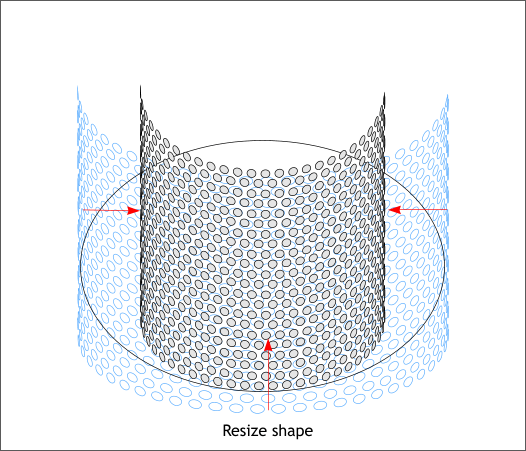
Select the enveloped shape with the arrow pointer (the Selector Tool F2). Drag the left and right side, center bounding box handles towards the center and the bottom center bounding box handle upwards to reshape the enveloped object as shown. The blue shape represents the shape before resizing.
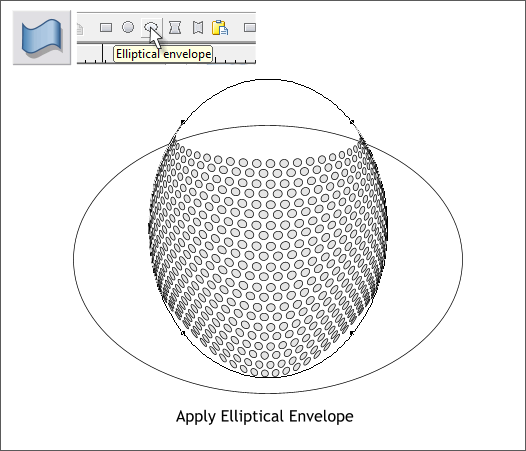
Select the Mold Tool (Ctrl F6) again and apply an Elliptical envelope. You will end up with kind of an egg shape as shown.
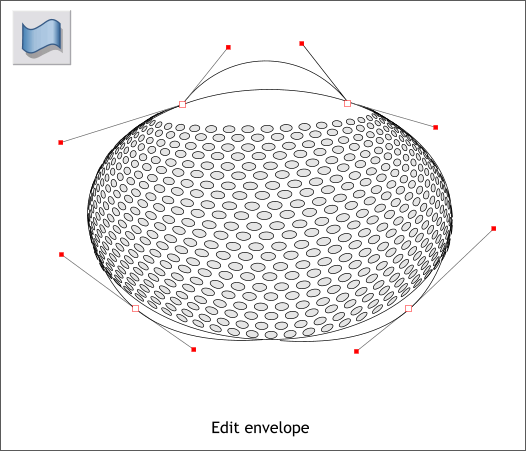
This step requires a bit of trial and error. Drag the four control points to the locations shown on the ellipse. Click on the control points and drag the red control handles until the shape matches the ellipse. You will need to adjust all the handles to get the shape correct. There will be a lot of going back and forth to get it right. Just keep working at it.
|
|||||||||
|
|
|||||||||


