|
 Select all shapes and set the outline color to none. Select all shapes and set the outline color to none.
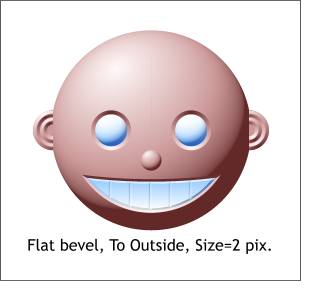
(Either select None from the Line Width drop down list on the Infobar, or right click on the crosshatched box to the left of the screen palette. Select the teeth and apply a Flat bevel, To Outside,
Size, 2pix. If the teeth don't look correct, you probably applied the bevel to the Inside. Save your image and take a short break.
NOTE: When I italicize a word such as the Line Width drop down list, this indicates the name that appears if you let your cursor rest over the drop down list or icon for a few moments. |

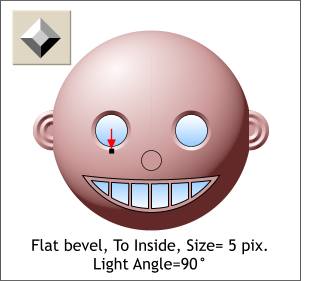 Select the larger of the
two eye circles. Apply a Flat bevel, To Inside, Size, 5pix. Repeat for the opposite eye circle.
Select the larger of the
two eye circles. Apply a Flat bevel, To Inside, Size, 5pix. Repeat for the opposite eye circle. Select the larger of the mouth shapes and apply a Flat
bevel, To Inside, Size 5pix, and Light Angle, 90.
Select the larger of the mouth shapes and apply a Flat
bevel, To Inside, Size 5pix, and Light Angle, 90.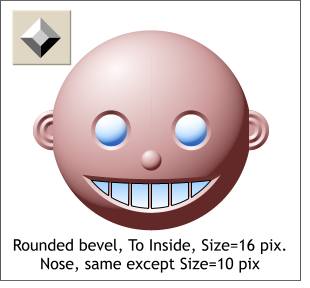 Select the two eyeball circles and apply a Rounded,
To Inside, Size, 16pix bevel.
Select the two eyeball circles and apply a Rounded,
To Inside, Size, 16pix bevel.