 |
 |
|||||||
| 0 1 2 3 4 5 6 7 8 9 10 11 Download Zipped Tutorial | ||||||||
|
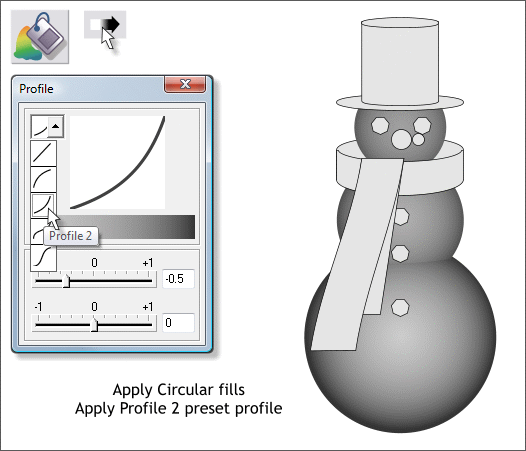
Using the technique described on the last page, create three Circular fills. Use the color picker tool either from the left of the screen palette or from the Color Editor (Ctrl e ) to sample the colors from the reference circles you created earlier. Select all three circles and switch to the Fill Tool (F5). Click the Profile arrow icon on the Infobar to open the Profile dialog and select Profile 2. The reason for the Profile 2 preset is this. In a stereogram, a normal grayscale circular fill translates as more of a cone shape than a circle. A Profile 2 preset forces the center color out towards the side and creates a 3D shape that is circular. Your three circles should look like the example above.
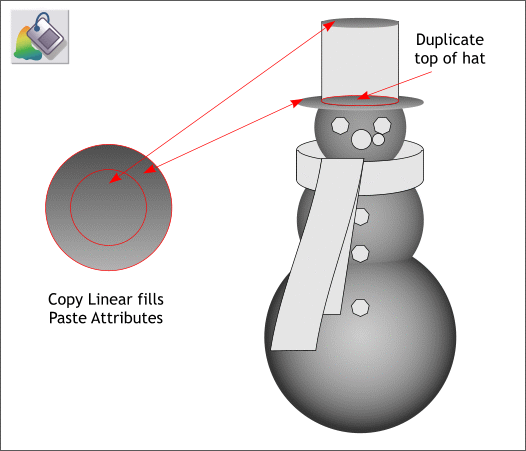
The brim of the hat and the crown are Linear fills because they are flat planes that go back in space. Copy each of the corresponding Linear fills from the reference circles and Edit > Paste Attributes to apply the fills to the ellipses as shown.
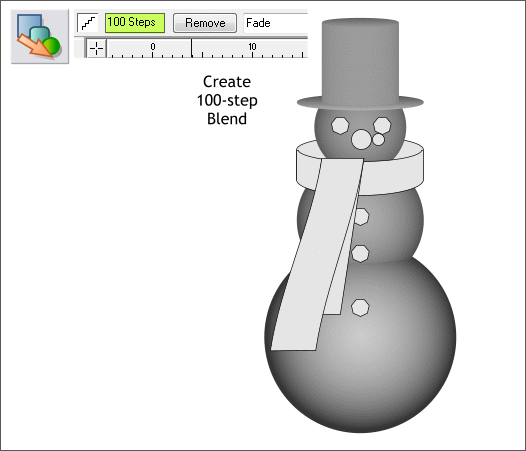
We do not need the rectangle part of the hat (the crown) so you can delete it. We will use a blend instead. Select the Blend Tool (F7 or W). Drag from the bottom small ellipse to the top to create a blend. Change the number of steps on the Infobar from 5 to 100 and press Enter to apply the change. This creates what is in essence a solid tube shape.
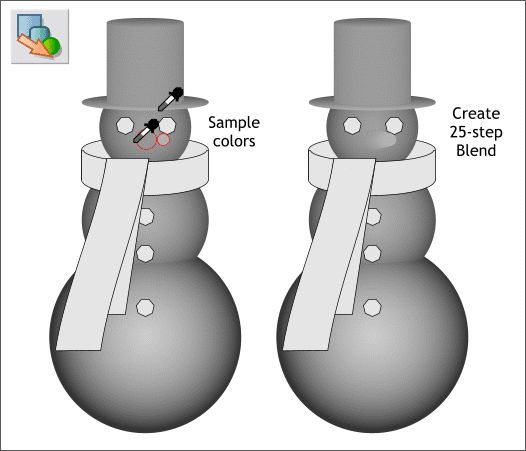
Next the carrot nose. Select the larger of the two circles and use the color picker to sample the color just to the left of the vertical middle of the circle. Select the smaller circle to the right. Sample the lightest color from the brim of the hat. This will make the carrot nose come forward the same distance as the forward brim of the hat. Create a 25-step blend of the two circles. NOTE: As these various filled shapes and blends are created, remove the outlines.
|
||||||||
|
|
||||||||


