 |
 |
|||||||
| 0 1 2 3 4 5 6 7 8 9 10 11 Download Zipped Tutorial | ||||||||
|
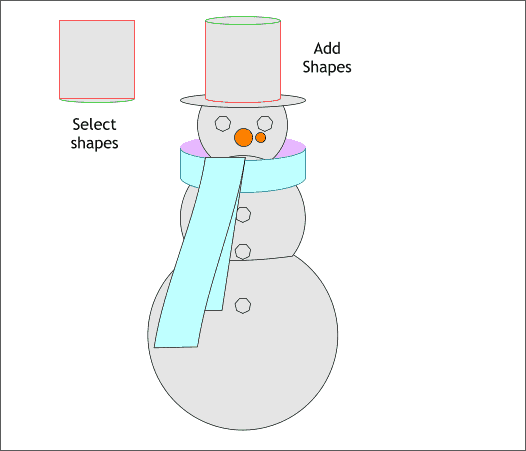
We will now work with the original to create the Color image Select the rectangle for the hat and the bottom smaller ellipse shown on the left. Arrange > Combine Shapes > Add Shapes, or press Ctrl 1. This creates a rectangle with a elliptical bottom for the crown of the hat.
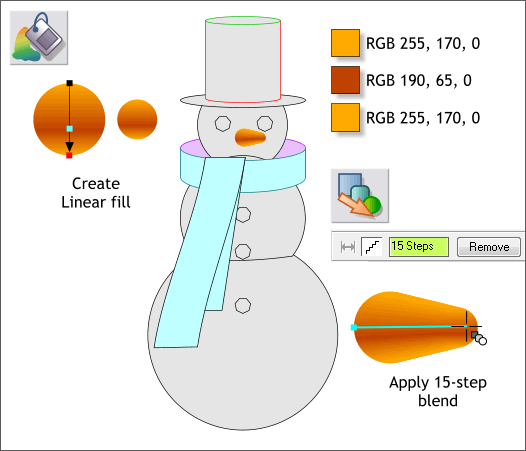
Select the larger circle for the carrot nose. Switch to the Fill Tool (F5) and apply a Linear fill. Double click on the fill path arrow to add another color. Edit the three RGB colors in the Color Editor (Ctrl e) using the RGB Color Model. TIP: The easy way to create a Linear fill is click on the shape with the Fill Tool where you want the fill to begin, and drag to where you want the fill to end. Hold down the Ctrl key to constrain the direction of the fill if desired. Copy the fill to the clipboard (Ctrl c). Select the smaller carrot circle and Edit > Paste Attributes, or press Shift Ctrl a. Select the Blend Tool (F7 or W). Click on the larger orange circle and drag to the center of the smaller orange circle to create a blend. Increase the number of Blend Steps to 15 on the Infobar and press Enter to apply the change.
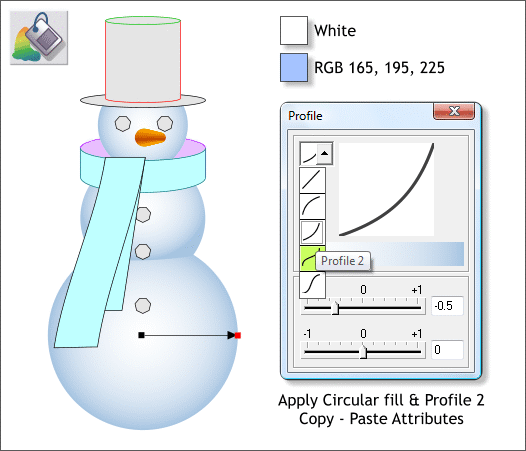
Select the largest circle. Select the Fill Tool (F5) and from the drop down list of Fill Types on the Infobar, select Circular. Edit the two colors shown in the Color Editor (Ctrl e). Click the Profile arrow icon on the Infobar to open the Profile dialog. Select Profile 2 from the drop down list. This widens the white area and forces the blue color to the outside. Copy the fill to the clipboard (Ctrl c). Select the other two circles and Paste Attributes (Edit menu) as shown.
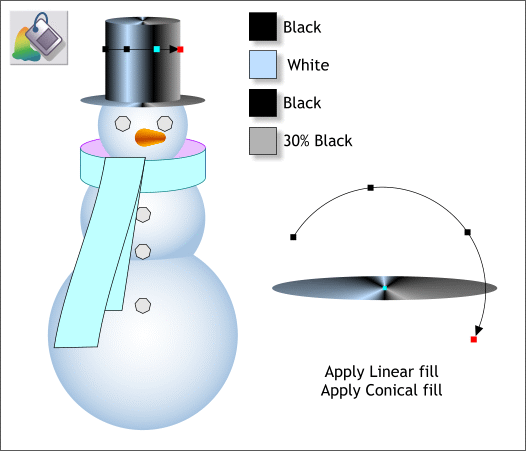
Apply a Linear fill to the rectangle using the colors shown. Select the brim of the hat. From the drop down list of Fill Types, select Conical. Rotate the fill path arrow around as shown and use the same colors. Copy the fill and paste attributes onto the top of the hat.
|
||||||||
|
|
||||||||


