 |
 |
|||||||
| 0 1 2 3 4 5 6 7 8 9 10 11 Download Zipped Tutorial | ||||||||
|
To create the Mapped Texture Stereogram we will use an application called Stereographic Suite 2 from IndaSoftware. You need to have the application installed. So if you have not downloaded Stereographic Suite 2, click here. Download and install the application. We'll wait for you while you do this.
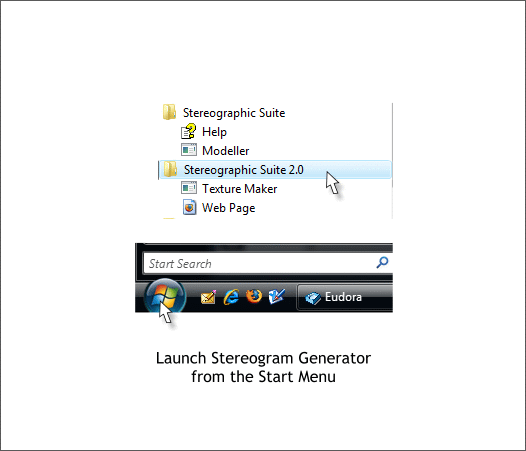
OK, click Start > All Programs on the taskbar and find Stereographic Suite 2 in your list of installed programs. Select Stereogram Generator and click to open the application.
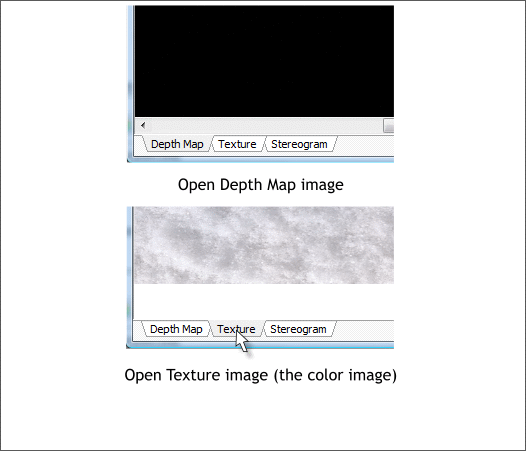
The screen for Stereographic Suite 2 is quite large so I will only show the relevant areas. The program is divided into three sections which have corresponding tabs at the bottom left of the window. The first section is Depth Map. There are several ways to open the depth map image. The easiest is to drag and drop your file from the desktop onto the Depth Map screen. You can also click the Open button at the top of the screen or double click on the screen itself to Browse for the image. I like to put my images on the desktop because this saves time searching for them. Click the Texture tab to go to the Texture screen. Drag and drop the file Color onto the screen or use one of the other two methods to open the file.
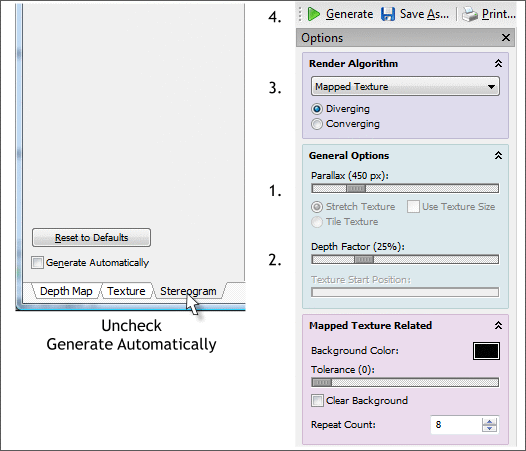
Click the Stereogram tab. This is the screen where all the real work is done. Mapped Texture Stereograms take a lot of computing power and can take some time to redraw. So for a high resolution image such as our snowman, I un-check the Generate Automatically check box at the lower left side of the Options menu. For hidden image stereograms or low resolution stereograms you can leave this checked and every time you make a modification the image automatically updates. You can also use the keyboard shortcut F9 to render each change. Select Mapped Texture from the Render Algorithm drop down list. The other options in the drop down list apply to hidden image stereograms. Normally you will pick the Diverging option (the default) unless you prefer to view the stereogram image cross-eyed. In that case choose Converging. Parallax refers to the space between each repeating object or panel. I did some experimenting and 450 worked best. As a rule of thumb, I select a Parallax setting that is 10, 15 or 20% the width of the depth image in pixels. The Depth Factor setting increases or decreases the depth of the 3D image. In the case of our snowman, 25% worked best. For hidden image stereograms , 30-50% works better. More than 40% can be hard and the eyes and harder for stereogram-challenged people to see. You can experiment with all the settings to see how they affect the image. When you have make these settings (1-4 above) press the green Render button or press F9. Depending upon the speed of your computer the Mapped Texture Stereogram will be rendered on the screen. On slower computers this may take ten seconds or more. Be patient. The green progress indicator on the lower right shows the progress.
|
||||||||
|
|
||||||||


