 |
 |
|||||||
| 0 1 2 3 4 5 6 7 8 9 10 11 Download Zipped Tutorial | ||||||||
|
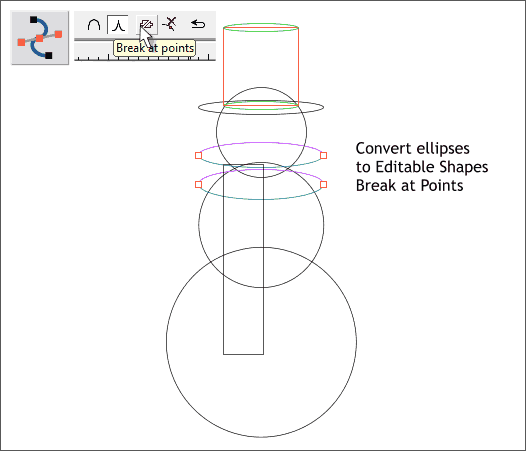
Hold down the Shift key (to select multiple objects). Click on the two wide ellipses that you just created. From the Arrange menu, select Convert to Editable Shapes. Switch to the Shape Editor Tool (F4). Hold down the Shift key again and select the middle control points (shown above in red outline). Press the Break at Points icon on the Infobar. This breaks the ellipses into four arcs. Again I have given the arc lines different colors to illustrate the four separate arcs.
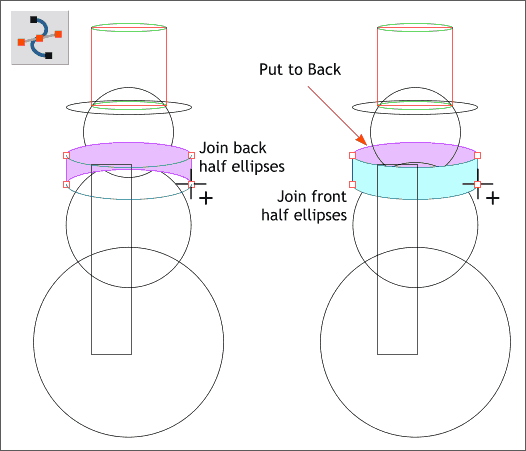
Hold down the Shift key and select the two back arcs. Switch to the Shape Editor Tool (F4). Make sure the Make Line icon (the diagonal line) on the Infobar is selected. This is important. Click the top left control point. Click away from the arcs a short distance and drag a line to the bottom left control point. The cursor will change to a + to indicate the lines are about to be joined. Repeat this step on the right side. The shape should now be filled (probably black the default fill color). Do the same thing with the front two arcs. You may need to make the filled color for the top shape lighter so you can see the other two arcs. When both shapes are filled, Send the top shape to the back (Ctrl b or Arrange > Put to Back).
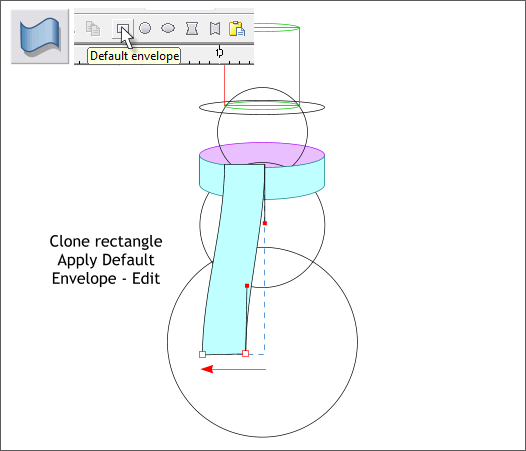
Select the tall rectangle and clone it (Ctrl k). Switch to the Mold Tool (Shift F6). Click the Default Envelope icon (the first rectangle icon on the Inforbar). Drag the bottom two control points to the left as shown. NOTE: The blue dashed outline represents the original rectangle.
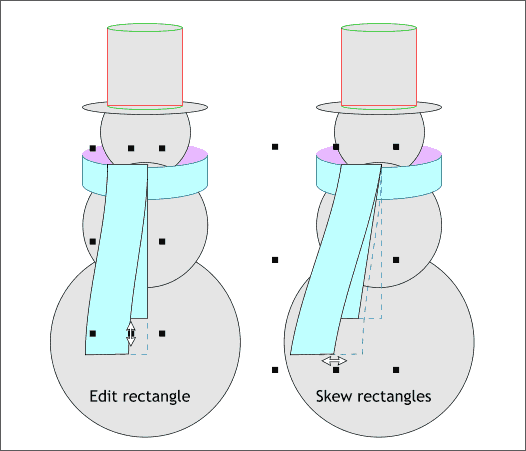
Select the original rectangle. Drag the bottom middle bounding box handle upwards as shown above on the left. Select both rectangles. Place the cursor just above the bottom center bounding box handle. The cursor changes to a double arrow. Drag to the left about 30 pixels. NOTE: You can still click twice on a selection to enable rotate/skew mode and with older versions this is necessary. With the newer versions of Xtreme, you can place the Selector Tool (the arrow pointer) inside the bounding box handles to rotate and skew a selection.
|
||||||||
|
|
||||||||


