
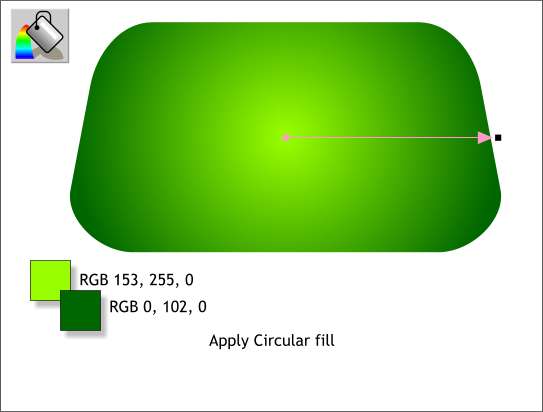
Select the modified rectangle then select the Fill Tool. From the drop down list of Fill Types on the Infobar, select Circular. Use the two RGB colors shown.
 HOW TO: If you are new to Xara and do not know how to mix and apply an RGB color to a fill, here is how to do it.
Once you have applied the Circular Fill, press Ctrl e or click the tiny color wheel icon to the left of the screen palette, to open the Color Editor . From the drop down list, select RGB Color Model. Key in the RGB values as specified above. Key in the first value in the R (red) text box, the second in the G (green) text box, and the third color in the B (blue) text box.
To apply starting and ending colors to a gradient fill, click the small square on the left of the arrow (the fill path) to select the center color and enter the lighter green values. Now click the square at the end of the arrow and apply the darker value. (You can press the Tab key to move from square to square).
To add a color to the fill path, double click on the arrow with the Fill Tool cursor. You can add as many color stations as you want. To delete a color station, simply right click on it. You can move the color stations by either dragging them, or using the arrow keys on your keypad
Select the duplicate modified rectangle you made earlier. Copy it to the clipboard (Ctrl c). Select the Contour Tool and drag any of the red arrows towards the center to create an Inner Contour. Change the amount on the Infobar for the Contour Width to 16pix and press Enter to apply the change. Press the Insert Path icon (shown above). This eliminates all the contour rings except the last one. Paste the copy onto the page (Ctrl Shift v ) and center and position it as shown above. (I've given the copy a red outline to make it easier to see). The blue dashed lines represent the contour rings before the Insert Path icon was pressed.
NOTE: Xara has two ways to paste from the clipboard. Ctrl v pastes the object in the center of the screen. Ctrl Shift v (hold down both keys and press v) pastes the object in the same position from which it was copied. This is the same as Adobe Illustrator's Paste in Front command.
Select both shapes (Hold down the Shift key and click on each shape to multiple select). From the Arrange menu, select Combine Shapes... and from the fly out menu, select Subtract Shapes . This path command removes all but the portion shown in pale blue. The areas shown in blue dashed line are automatically deleted.
Apply a pale blue fill to the shape using the RGB values shown.
|
|
|
|
|
|
|
|
|
|
|
|