 |
 |
|||||||
| 0 1 2 3 4 5 6 7 8 9 10 11 Download Zipped Tutorial | ||||||||
|
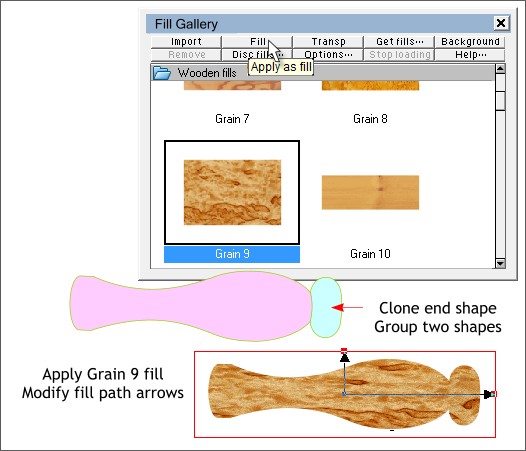
Clone the end shape of the handle. Select the clone and the larger shape (shown above in pink) and group them (Ctrl g). Leave the handle group selected. Open the Fill Gallery (Shift F11). From the Wooden Fills folder, select Grain 9 and press Fill. (You can also drag and drop the fill on a selection). Adjust the fill path arrows as shown.
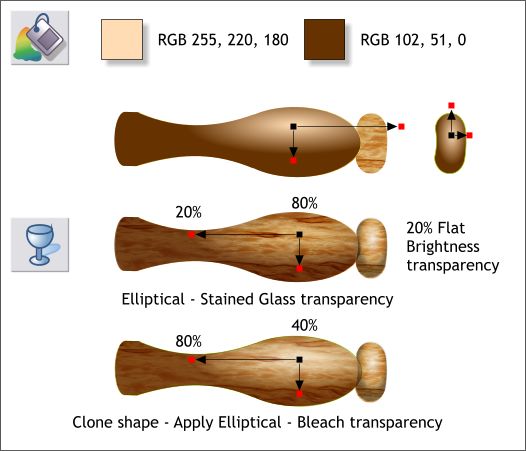
Ungroup the two shapes (Ctrl u). Clone the larger handle shape (Ctrl k). Apply an Elliptical fill to the larger shape using the two colors shown above. Modify the position of the fill and the fill path arrows so that the lightest part of the fill is directly over the most elliptical part of the handle. Apply a smaller Elliptical fill to the clone of the end shape. Select the larger elliptical-filled shape with the Transparency Tool (F5). Apply an Elliptical Stained Glass transparency. Modify the Transparency slider settings as shown in the center example. Click on either of the outside control handles (the small squares). Adjust the Transparency slider setting to 20% . Change the setting for the inside of the transparency to 80%. Apply a Flat, Brightness, 20% transparency to the small end shape. Clone the larger transparent shape. Change the Transparency Type to Bleach and adjust the inner and outer Transparency slider settings as shown.
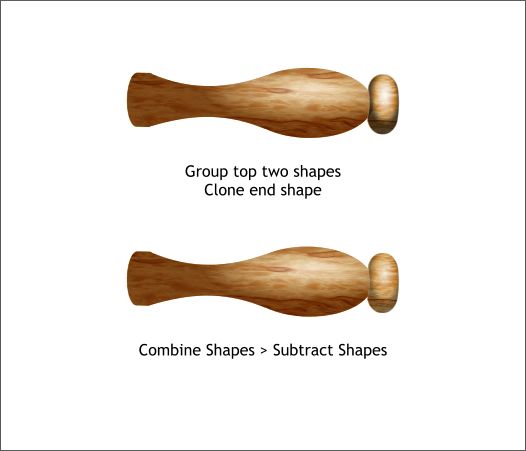
Group the top two transparent shapes. (Alt click two times on the top shape to select the next shape down, then Shift click the top shape to select both transparent shapes, then Ctrl g to group). Clone the end shape. Select the clone and the grouped transparent shapes, and Arrange > Combine Shapes > Subtract Shapes (Ctrl 2). This removes a small portion of the large shape that was overlapping the end shape.
|
||||||||
|
|
||||||||


