 |
 |
|||||||
| 0 1 2 3 4 5 6 7 8 9 10 11 Download Zipped Tutorial | ||||||||
|
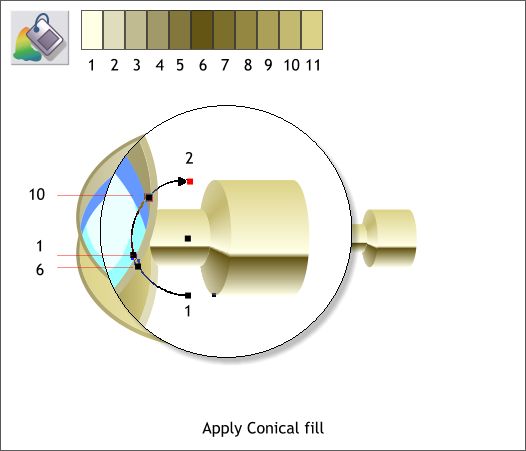
Select the C shape with the Fill Tool. From the Fill Type drop down list on the Infobar, select Conical. Drag the control point on either end and rotate the fill path arrow so the top and bottom control points are vertical and the half circle is on the left side. Drag the center of the fill to the left of the C shape as shown above. Apply the colors as shown and drag colors 1 and 6 until they align with the colors on the other tubular shapes.
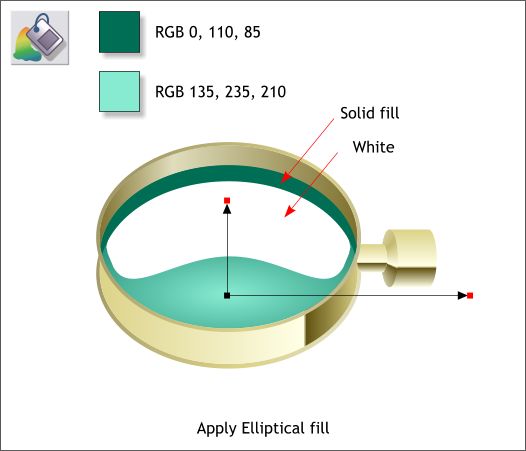
Select the crescent shape at the top of the glass area and apply a Flat fill using the deep blue green color shown above. Select the glass area with the Fill Tool (F5) and from the drop down list of Fill Types select Elliptical. Use the two colors shown above. Using the Fill Tool cursor, drag the center of the fill down and extend the fill path arrows as shown in the example above.
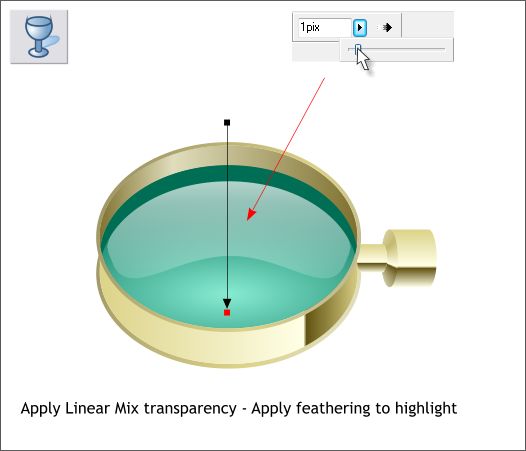
Select the highlight shape and apply a Flat White fill. Apply 1 pixel of feathering using the Adjust Size of Feather Region slider found at the top right area of the Infobar. Feathering softens the edges. Select the Transparency Tool (F6). Click on the white highlight shape to select it. Then click above the shape, hold down the Ctrl key, and drag downwards past the bottom of the shape as shown above to apply a Linear transparency.
|
||||||||
|
|
||||||||


