 |
 |
|||||||
| 0 1 2 3 4 5 6 7 8 9 10 11 Download Zipped Tutorial | ||||||||
|
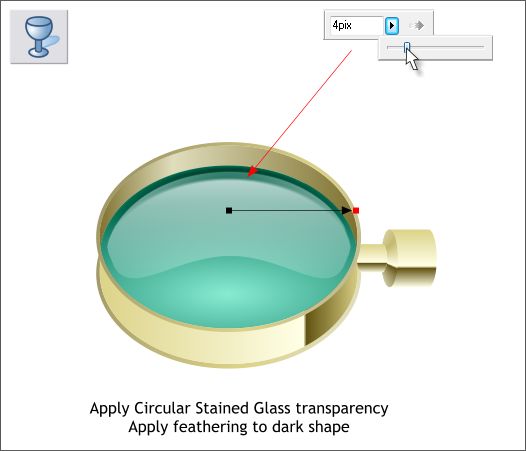
Select the dark blue green crescent shape. Apply 4 pixels of feathering to soften the edges. Select the shape with the Transparency Tool (F6). From the drop down list of Transparency Shapes on the Infobar, select Circular. From the Transparency Types drop down list, select Stained Glass. This gives the glass the impression of thickness. TIP: You can apply a Circular fill or transparency by holding down the Shift key and dragging away from the center of the fill.
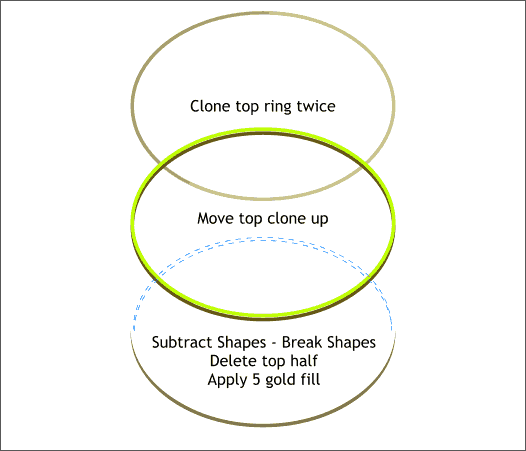
Clone the top O-shaped ring two times. Move the top clone up about the width of the ring. Combine Shapes > Subtract Shapes (Ctrl 2). From the Arrange menu select Break Shapes. Delete the top half.
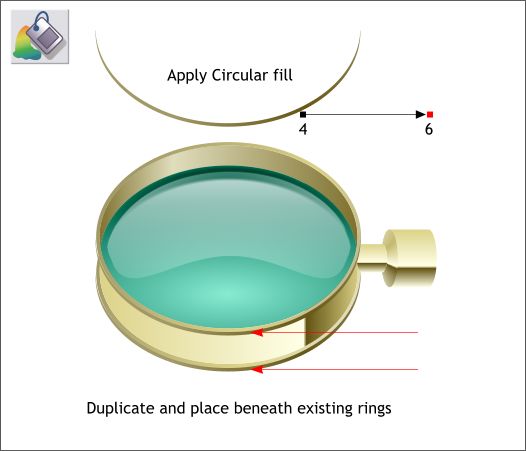
Apply a Circular fill using the two colors shown above. Move the center of the fill to the right. Position the shape directly under the bottom of top rim. Duplicate the shape (Ctrl d) and position it under the bottom rim as shown above. Save your drawing and take a short break.
|
||||||||
|
|
||||||||


