 |
 |
|||||||
| 0 1 2 3 4 5 6 7 8 9 10 11 Download Zipped Tutorial | ||||||||
|
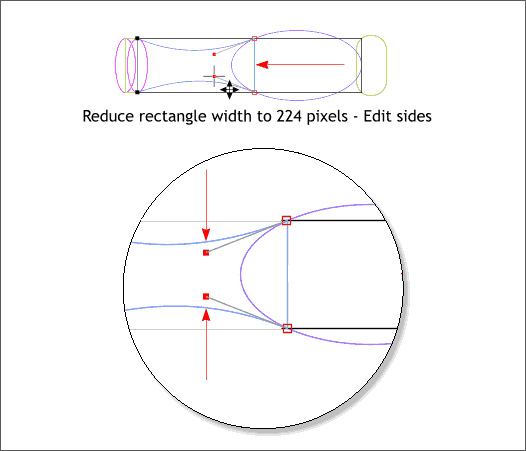
Select the long rectangle and Arrange > Convert to Editable Shapes. Drag the right middle bounding box handle (the small black squares that surround a selected object) to the left until the right top and bottom side align with the curve of the large ellipse as shown above top. With the rectangle selected, switch to the Shape Editor Tool (F4). Drag the top side downwards towards the middle and drag the bottom side upwards towards the middle. The two concave sides should be mirror opposites. Click the top aright control handle and drag the red Bezier control handle towards the center. The angle of the handle should be parallel to the curve of the ellipse as shown in the example above. Do the same thing with the bottom right control handle.
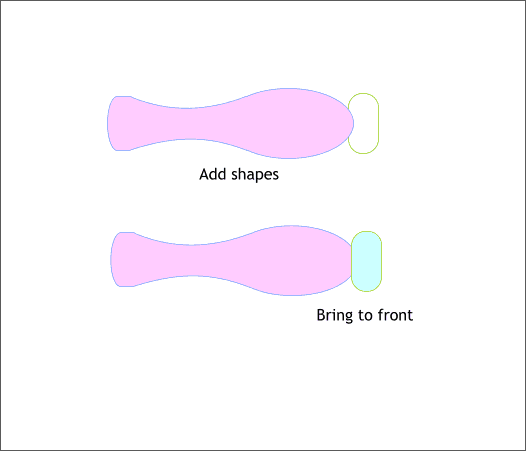
Select all of the handle shapes except the rounded rectangle on the right. Combine Shapes > Add Shapes (Ctrl 1). Bring the rounded rectangle to the front (Ctrl f).
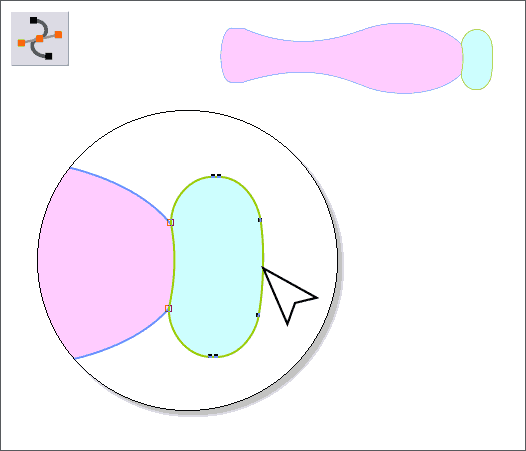
Select the rounded rectangle. Switch to the Shape Editor Tool (F4). Gently drag the left and right sides into graceful curves as shown above in the enlargement. Move the control points on the left side (shown with red outlines) towards the middle a short distance until the points are directly over the outline of the handle shape.
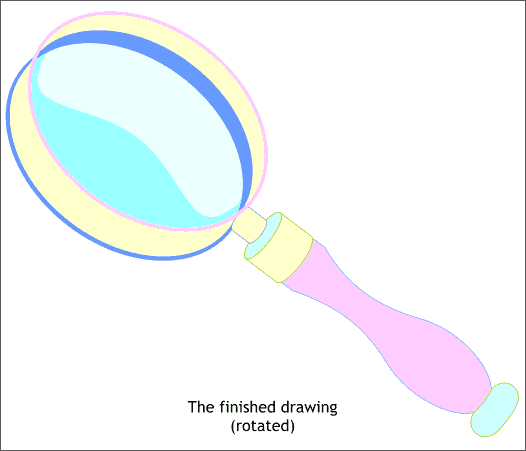
Here are all the elements in place. I have rotated the drawing to get everything in the frame. Save your drawing and take a short break. When you get back, we'll add the color.
|
||||||||
|
|
||||||||


