 |
 |
|||||||
| 0 1 2 3 4 5 6 7 8 9 10 11 Download Zipped Tutorial | ||||||||
|
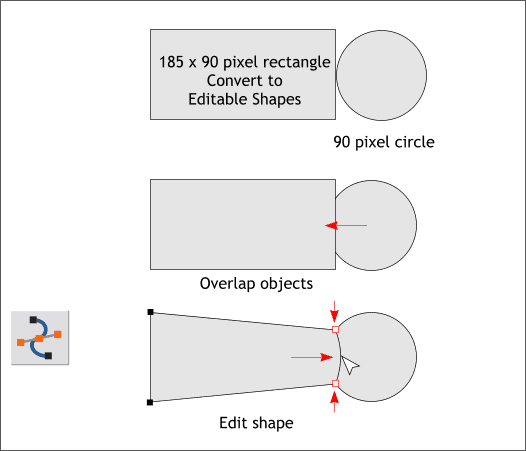
As an extra added bonus, at no additional charge, we'll (there I go again, make that you'll) create a decorative brass finial to go on the end of the handle. Because the shape is so small, you'll make it larger at first and then reduce it. Create a circle and rectangle to the sizes shown. Bring the rectangle to the front (Ctrl f) and let the rectangle overlap about 1/5 of the circle as shown in the middle example above. Convert the rectangle to Editable Shapes (Arrange). With the rectangle selected, switch to the Shape Editor Tool (F4). Select and drag the top and bottom right control points towards the center until the points are directly over the edge of the circle. Drag the right side of the modified rectangle into a gentle curve.
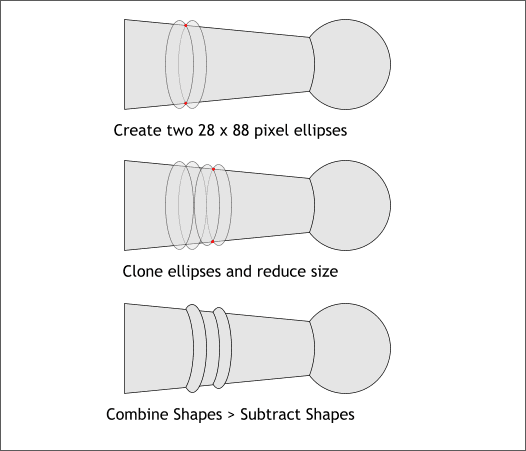
Create two ellipses to the sizes and positions shown in the top example above. Clone the two ellipses, reduce their size (approximately 25 x 80 pixels) and move them to the right as shown in the middle example. The area where the two ellipses overlap (indicated with the red dots) should be directly over the edges of the tapered rectangle. Make sure the left ellipse for each set of ellipses is in front (Ctrl f). Then one set at a time, Combine Shapes > Subtract Shapes (Ctrl 2).
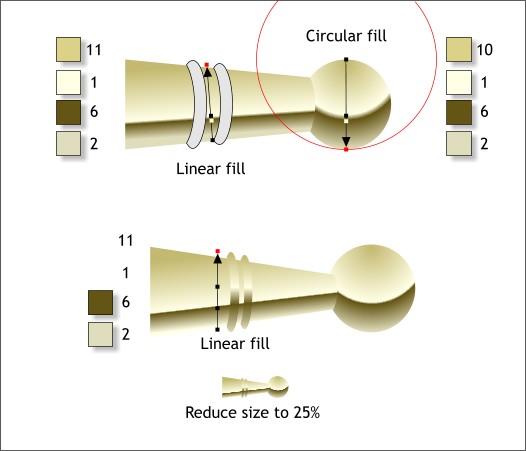
Apply the fills shown above. When all fills have been applied, select the 4 shapes and group them (Ctrl g). Reduce the group to 25%. (Enter 25 in the H or W % text entry box on the Infobar and press Enter to apply the change. Are you ready for the big finish???
|
||||||||
|
|
||||||||


