 |
 |
|||||||
| 0 1 2 3 4 5 6 7 8 9 10 11 Download Zipped Tutorial | ||||||||
|
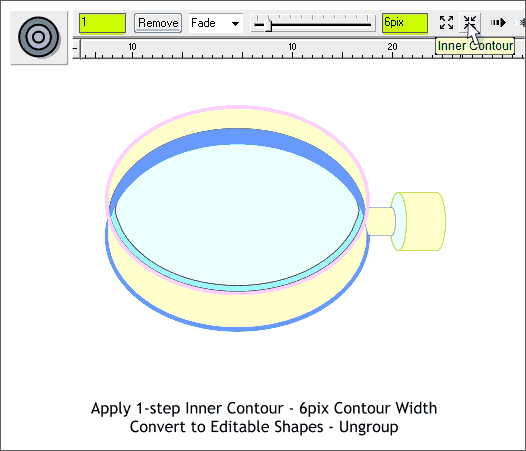
Select the glass shape. Apply a 1-step Inner Contour with a 6pix Contour Width. (Key in 1 in the Contour Steps text entry box and press Enter. Press the Inner Contour inward facing arrow icon. Move the slider to 6pix or key in 6 and press Enter). Convert the contour to Editable Shapes (Arrange > Convert to Editable Shapes) then Arrange > Ungroup or press Ctrl u.
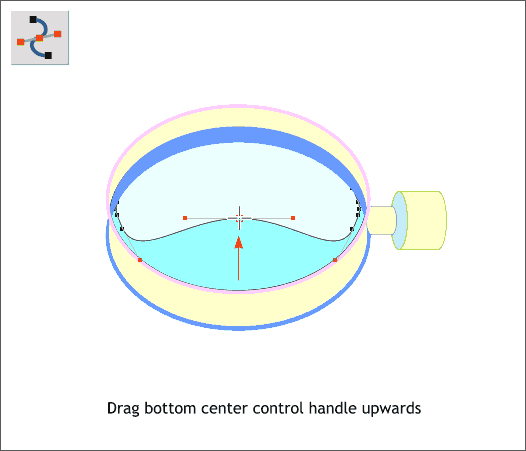
With the smaller contour shape selected, switch to the Shape Editor Tool (F4). Select the bottom center control point and press the up arrow key on your keyboard until the control point is about in the center of the glass. This completes the glass and brass portion of the magnifying glass. Next we'll (you'll) create the handle.
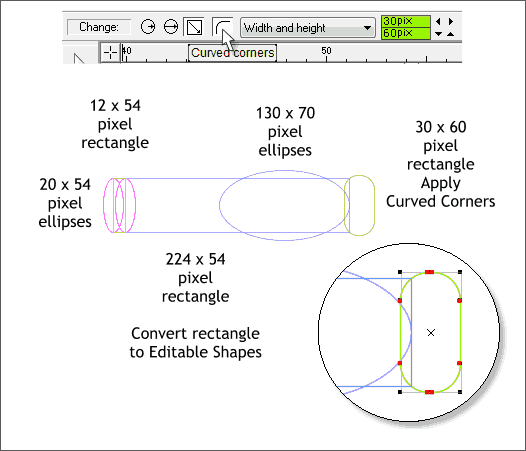
Create a series of ellipses and rectangles to the sizes and positions shown above. Select the rectangle on the far right side with the Rectangle Tool (Shift F3) and press the Curved Corners icon on the Infobar. Drag any of the small control handles (shown in red) to increase the roundness until the rectangle is pill-like in shape. TIP: If you resize the small rectangle the rounded corners may not be round. To overcome this, use the resized rectangle for a guide. Draw a new rectangle on top of the resized rectangle to the exact same size. Then apply Curved Corners. Delete the first rectangle. Convert the rectangles to Editable Shapes (Arrange menu).
|
||||||||
|
|
||||||||


