 Place all the elements aside for a few moments while we
create a chrome tube for our interface. Place all the elements aside for a few moments while we
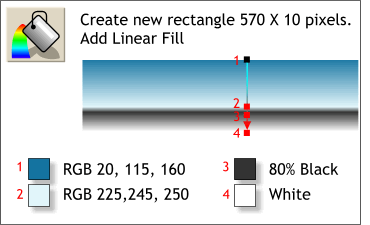
create a chrome tube for our interface.Create a new rectangle 570 pixels wide by 10 pixels tall. Select Linear from the Fill Type drop down list and drag the fill path handles to the vertical position. Zoom in
very close to the shape and create a four color fill. Drag the third and fourth colors onto the fill path toward the bottom 1/3rd as shown and use the Color Editor to alter the colors using the RGB values shown.
TIP: When adding colors to the fill path, you can drag and drop any color
onto the fill path just to get the color control points onto the fill path, and then go back and select each color point and either click a color on the screen palette or mix a new color in the Color Editor. You can also add
colors that are close to what you want and then fine tune them in the Color Editor. For most of the glass colors, I used Spring Green Cyan and then edited the color to be lighter, darker, or more or less saturated.
|

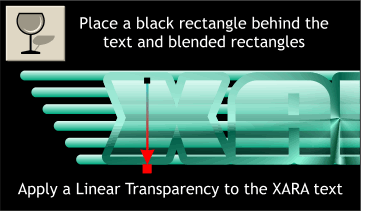 Place a black rectangle behind
all the objects. Don't worry about the size right now.
Place a black rectangle behind
all the objects. Don't worry about the size right now.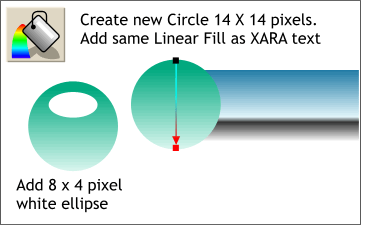 Next we'll create a transparent sphere to cap off
either end of the chrome tube.
Next we'll create a transparent sphere to cap off
either end of the chrome tube.