Part One — Creating the Glass Title
We will be working with Pixels as our Units of measurement and use 0-255 for our Color Units. If you are new to Xara here is how to do this. Right click on the page and select
Page Options from the pop up menu. In the Units tabbed section, select Pixels from the drop down list and check the radio button next to Color Units: 0-255. Go to the Grid and Ruler
tabbed section. In the Major Spacing text entry box key in (exactly like this) 100pix and in the Number of Subdivisions, text entry box, key in 10. Press OK to close the dialog. 
NOTE: The image we will be
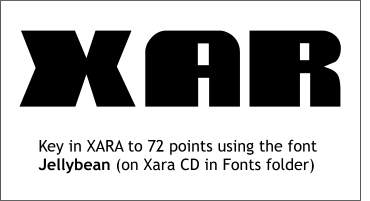
creating will be larger than my illustration space. Key is the whole word XARA. Select the Text Tool and click on the page to place the
insertion cursor. Key in XARA. Drag the text cursor over the text to select it and select Jellybean from the drop down Fonts list on the Infobar at the top of the screen. Select 72pt from the
Size drop down list on the Infobar. NOTE: The font Jellybean
can be found on the Xara X CD in the Fonts folder. Place the Xara X CD in your CD disc drive. Open the Fonts Gallery
on the Infobar (it's in the top right portion of the screen and and has an icon with an Aa). Select Disc Fonts. Xara X should locate your CD drive and the Fonts folder. Click TrueType
then press Add. An index of all TrueType fonts will be added to the Fonts Gallery. (The fonts are not installed, only the listings). Jellybean is in the folder
TrueType Fonts with Capitals Only. Scroll down to Jellybean, select it and press Install. Xara X will ask you to confirm you want to install this font. Press Install
and next time you scroll though the Fonts list, Jellybean will be there. |

