 Create a second rectangle 490
pixels wide by 10 pixels tall. Use the same technique from the previous page to change the Curvature setting to 0.7 and copy and paste the fill (Paste Attributes). Create a second rectangle 490
pixels wide by 10 pixels tall. Use the same technique from the previous page to change the Curvature setting to 0.7 and copy and paste the fill (Paste Attributes).
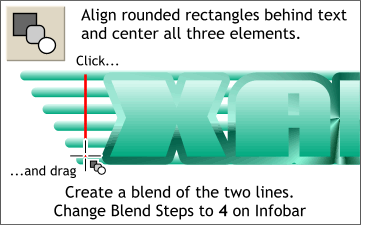
Center the wider rectangle along the top of the contour and center the shorter rectangle along the bottom of the contour. (Use the Object Alignment palette (Arrange > Alignment
) to center the three objects. Select the Blend Tool and click and drag from the top rectangle to the bottom rectangle to create a blend. Change the number of Blend Steps on the Infobar from 5 to 4
steps.
HOW TO:
One of the most frequently asked questions by new users is how to create a blend. It's easy. Click on the starting shape and without releasing the mouse button, drag until the cursor is over the second blend
shape. Release the mouse button and voila! The Blend is created. To change the number of Blend Steps, highlight the default number of steps
(5) by dragging the cursor over the number, key in a new number, and press Enter on your keyboard to apply the change. |

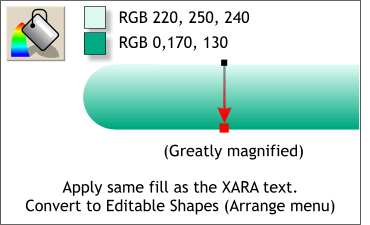 NOTE: The image on the left is greatly magnified and represents a magnified portion of the rounded rectangle we just created.
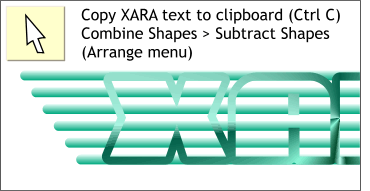 We want the blended bars to show though the text.
However, if we apply transparency to the text all we will see is the conical fill underneath. So, we need to remove the shape of the text from the conical fill.
We want the blended bars to show though the text.
However, if we apply transparency to the text all we will see is the conical fill underneath. So, we need to remove the shape of the text from the conical fill. 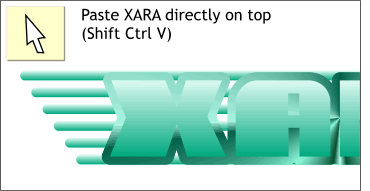 The text and contour shapes don't look any different.