
 Make sure the two stars are centered. Select the smaller and larger stars and from the Arrange pull down menu, select
Combine Shapes... Add Shapes to make one combined shape.
Make sure the two stars are centered. Select the smaller and larger stars and from the Arrange pull down menu, select
Combine Shapes... Add Shapes to make one combined shape.
Select the combined shape with the Fill Tool and from the drop down list of Fill Types on the top left side of the Infobar, select Circular. Make the outside color white and the inside color RGB 153, 153, 0.
Applying an RGB color works just like applying a HSV color except you select RGB Color Model in the Color Editor (Ctrl e) and enter the three values shown.
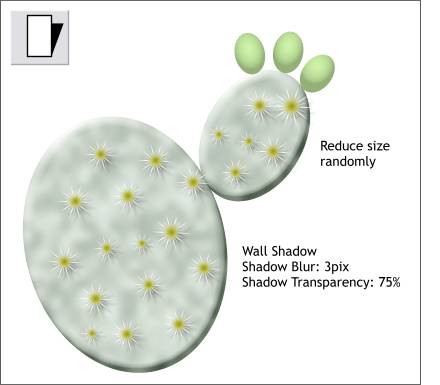 Reduce the size of the combined star and make several duplicates of slightly different sizes. Arrange the
duplicates around the cactus as shown.
Reduce the size of the combined star and make several duplicates of slightly different sizes. Arrange the
duplicates around the cactus as shown.
TIP: Drag a star and click the right mouse button to drop a duplicate before you release the left mouse button.
Select all the stars, then select the Shadow Tool. Select Wall Shadow and change the blur amount on the Infobar to 3pix to make the shadow less blurred.
Be careful to keep the shadow within the cactus and not going off the side.
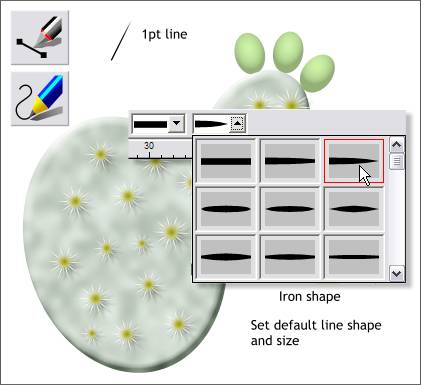 Select either the Pen or the Shape Editor Tool. Make a line about the size shown by
first clicking a starting point and then clicking the end point.
Select either the Pen or the Shape Editor Tool. Make a line about the size shown by
first clicking a starting point and then clicking the end point.
With the line selected, select the Freehand and Brush Tool. From the drop down list of Stroke Shapes, pick the third stroke on the top row (Iron Shape). Change the line width to 1pt by selecting this from the Line Width drop down list on the Infobar.
|
|
|
|
|
|
|
|
|
|
|
|