|

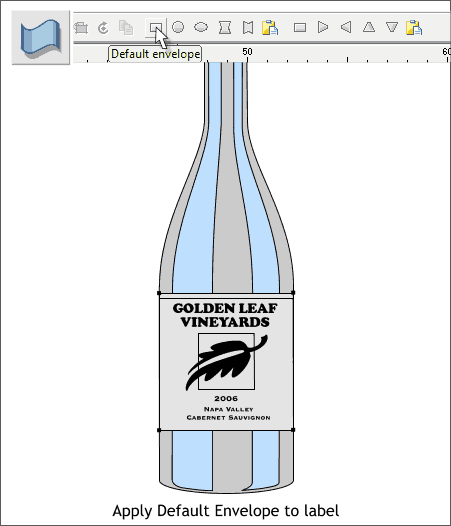
Select the label then select the Mould Tool (Shift F6).
On the Infobar, click the first rectangular icon (Default Envelope) to apply a Default Envelope to the label which we can use to conform the label to the rounded shape to the bottle.

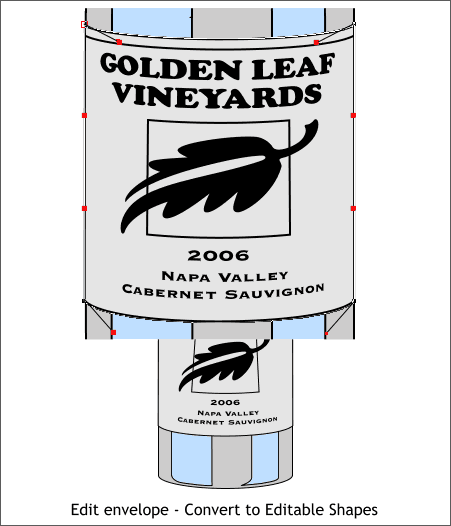
Click on the control points in the corner of the envelope and edit the control handles as shown. This is harder than it looks. Basically the top should not be
as curved as the bottom of the label and the sides of the square in the middle should be parallel to the sides of the label (that is the hard part). But again,
settling for anything less than perfection will definitely keep you awake at night or at the very least, haunt your sleep. It's kind of a push pull sort of thing.
When you have done the very best you can do, Arrange > Convert to Editable Shapes. Leave the label grouped for the time being.

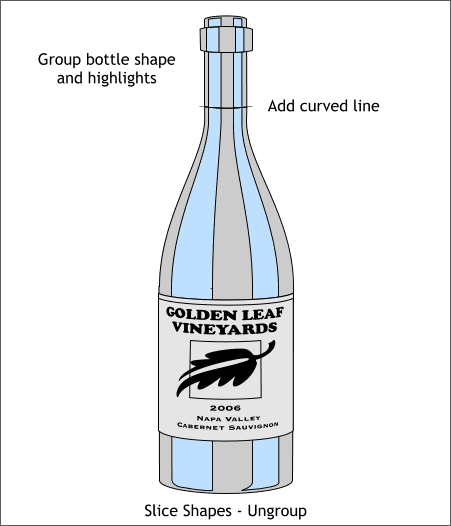
Select all the bottle shapes and highlights (Arrange > Group or Ctrl g).
Using the Shape Editor Tool (F4) add a small horizontal line about 90 pixels down from the top of the bottle. Drag a gentle and subtle curve as shown. Select the curved line and the bottle group and
Arrange > Combine Shapes > Slice Shapes (or press Ctrl 4). Then Arrange > Ungroup (Ctrl u).
Save your drawing and take another short eye break. And you two who did not take an eye break the first time (you thought I was kidding didn't you?) take an extra long eye break.
When we come back we will start coloring our drawing.
|