|

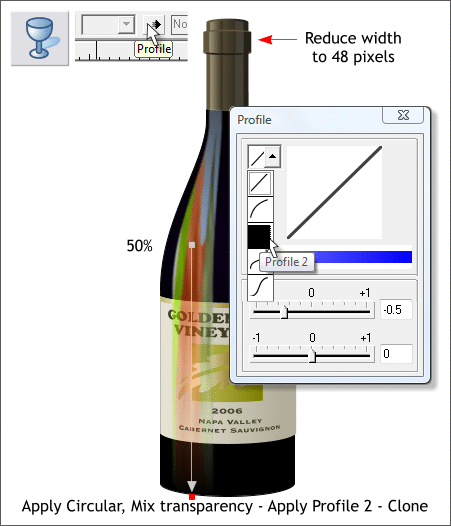
Select the rounded rectangular group at the top of the neck and reduce only the Width to about 48 pixels. That looks better.
NEW USERS: To change only the height or width of a selection, click the tiny black padlock icon (Lock Aspect Ratio) on the Infobar, so it is in
the raised position which disables proportional scaling. Enter 48 in the W text entry box and press Enter.
Select the reflection shape and place it on the left side of the bottle. Select the Transparency Tool (F6).
From the drop down list of Transparency Shapes on the Infobar, select Circular.
Drag the center of the circular transparency as shown above. With the inside control point selected, change the Transparency slider setting on the Infobar to 50% and press Enter
to apply the change.
Click the Profile arrow icon on the Infobar. From the Presets drop down list, select Profile 2. This extends the center of the transparency outwards a bit.
Clone this shape (Ctrl k). Select the label objects and bring them to the front (Ctrl f).

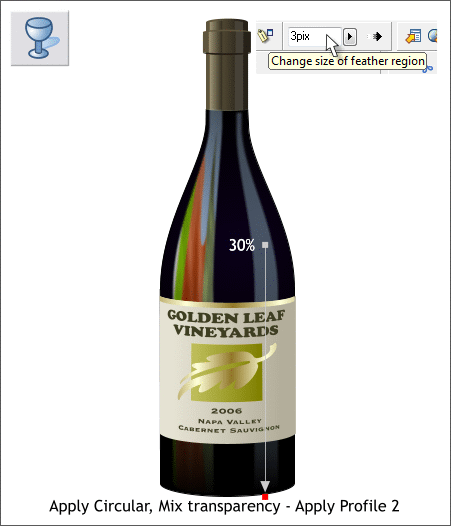
Apply a Circular, Mix transparency to the highlight on the right side and move the center of the transparency up a bit as shown.
Change the center Transparency slider setting to 30% and apply a Profile 2 preset.
Using the Feathering slider found at the top right of the Infobar, change the setting to 3pix. This softens the edges of the shape.
Bring the label objects to the front.

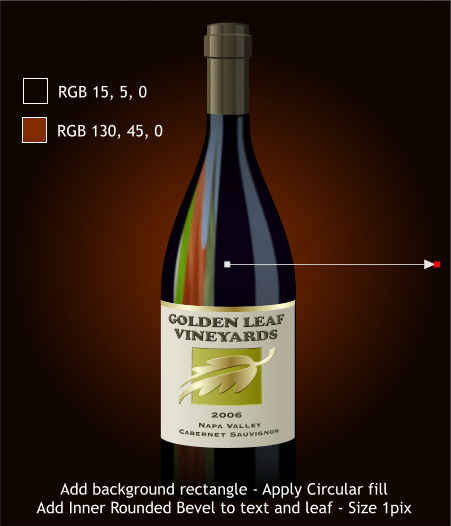
Finally add a rectangle behind the bottle and apply a Circular fill.
Add a Rounded Inside Bevel using the Bevel Tool (Ctrl F3) to the GOLDEN LEAF VINEYARDS text and to the leaf. Click the icon with the in-facing arrows
on the Infobar to change the bevel to inside.
From the drop down list of Slider Settings, select Size and change the size to 1pix. Press Enter to apply the change.
Apply a Flat, Inner Bevel, Size: 1pix to the green square. Drag the Light Angle arrow icon down and to the right to about the 5 o'clock position. This gives
the appearance of the beveled area going inward instead of popping out.

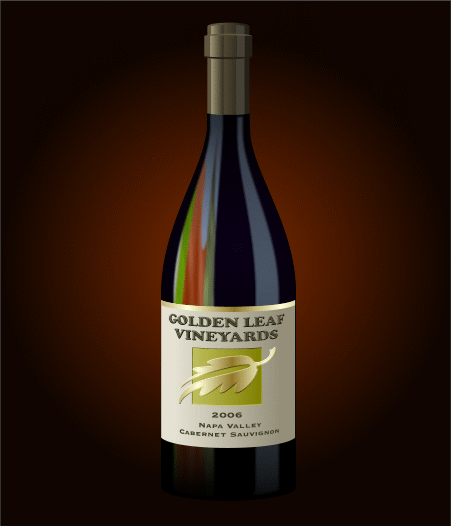
And that's it. It looks reasonably convincing don't you think?
It occurred to me after I was all done that another (better) way of handling the reflection would be to do a bitmap trace of an appropriate photo, and
apply the envelope to the trace, then to make a bitmap from the enveloped trace, apply it to the highlight shape as a fill, and apply the Gaussian Blur. If
you use this method, send me your final image so I can see how it turned out.
Your feedback is vital for maintaining my own mental health which is tenuous at best. Click the send e-mail link below to submit your comments, questions
and suggestions. Also I probably messed up some of the colors. If you catch any discrepancies let me know so future users can benefit from the correction.
And now if you'll excuse me, I feel a strong urge for a glass of red wine.
Gary W. Priester
Host of the Xara Xone
Send e-mail
|