 |
 |
||||||||
| 0 1 2 3 4 5 6 7 8 9 10 11 Download Zipped Tutorial | |||||||||
|
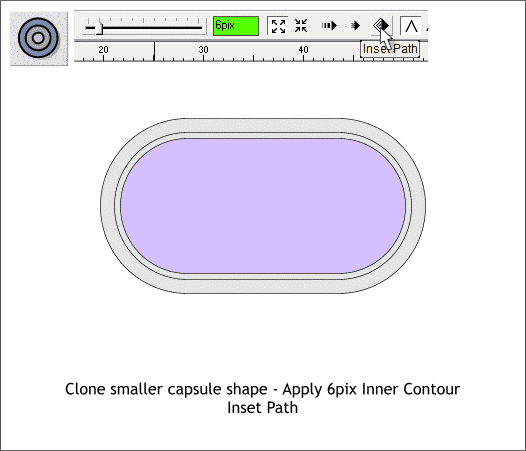
Clone (Ctrl k) the smaller capsule shape. Select the smaller capsule shape with the Contour Tool. Apply a 1 Step Inner Contour. Set the Contour Width setting to 6pix. Click the Inset Path icon (shown above). Inset Path retains just the inside contour shape (shown above in light purple). You should now have 3 capsule shapes as shown above.
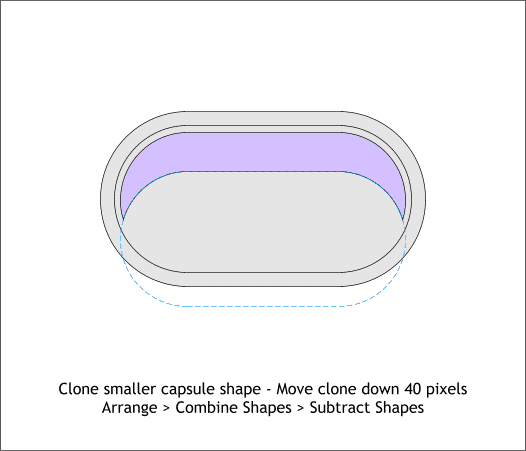
Clone the smallest capsule shape and move the clone downwards about 40 pixels. Hold down the Shift key and click on the smaller capsule shape and the clone. From the Arrange menu, select Combine Shapes > Subtract Shapes or press the keyboard shortcut Ctrl 2. (The blue dashed outline shows where the cloned capsule shape was before the Subtract Shapes operation).
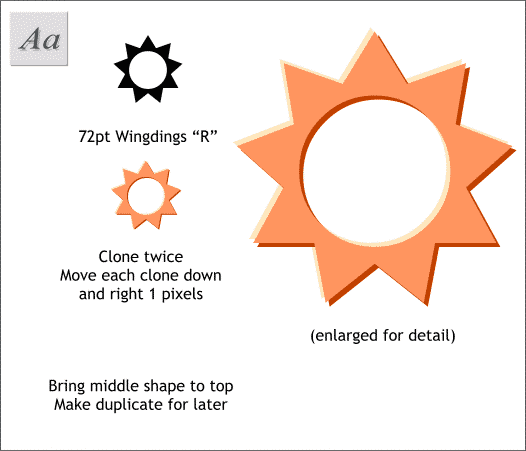
Using the Text Tool (F8) create a 72pt symbol such as the capital R in Microsoft Wingdings shown above. I notice that Microsoft is no longer making this font available for free. If you do not have Wingdings you can substitute a lowercase b in Zapf Dingbat or other symbol font. Make a clone and move the clone down and to the right 1 pixels in each direction. Make a clone of the clone and move it down and right 1 pixel. Select the second symbol which is sandwiched in the middle and bring it to the front (Arrange > Bring to Front or Ctrl f).
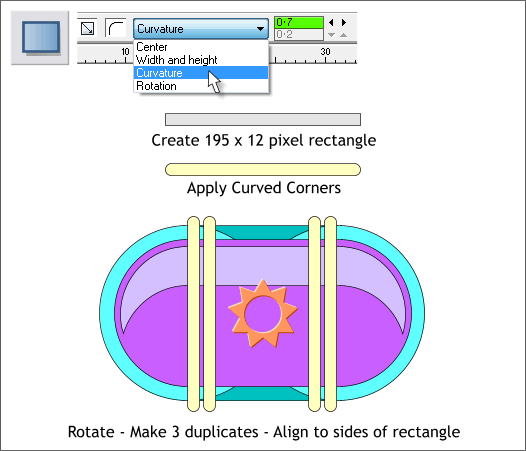
Select the Rectangle Tool (Shift F3). Create a rectangle 195 pixels wide and 12 pixels tall. Click the Curved Corners icon on the Infobar. From the Editable Items drop down list select Curvature. Change the setting to 0.7 using the arrow keys to the right of the text entry box. 0.7 in normal cases creates a perfect half circle at each end. But only in the horizontal position which is why we created a horizontal rectangle and not a vertical one (just in case you were wondering). Rotate the rectangle 90 degrees (enter 90 in the Angle of Selection text entry box on the Infobar and press Enter to apply the rotation). Make 3 clone rounded rectangles and space them as shown above. The two outside rounded rectangles align to the left and right sides of the larger rectangle (shown in the back in teal).
|
|||||||||
|
©2007 Gary W. Priester
|
|||||||||


