 |
 |
||||||||
| 0 1 2 3 4 5 6 7 8 9 10 11 Download Zipped Tutorial | |||||||||
|
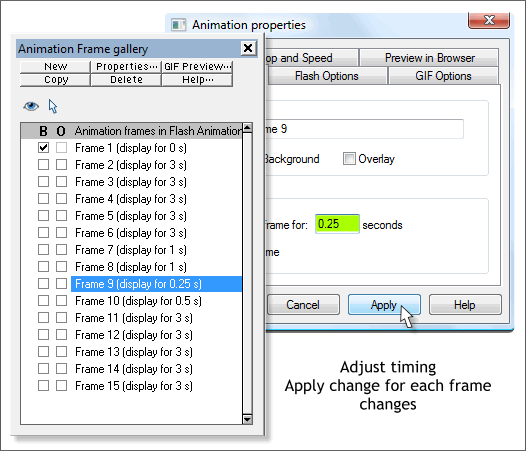
If it is not already open, open the Frame Gallery (Shift F12). Note the Display For time for each frame. Double click on the title bar of any frame to open the Animation Properties dialog. Change the Display For times to each frame as shown. Press Apply after each change. Each time you select a frame in the Frame Gallery, the Animation Properties dialog changes to that frame for editing.
Preview the Animation. We can add some pauses to accentuate the opening and closing of the quarter circles and center panels.
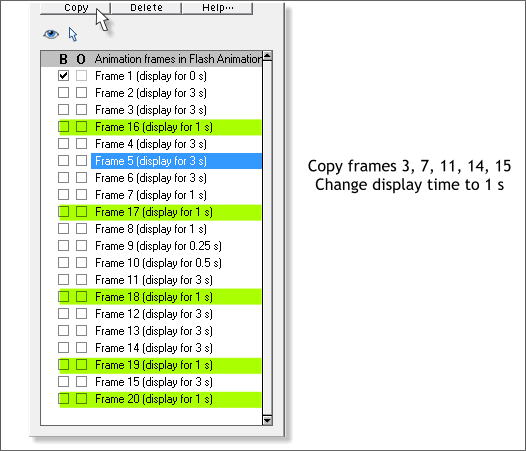
Click once on the title bar for Frame 3 and press Copy. Xara adds a new frame but at the bottom of the list. Drag the new frame (Frame 16) and drop it under Frame 3. Change the Display For time to 1 second. Repeat this step and copy frames 7, 11, 14, and 15. Change the position and display time for each as shown.
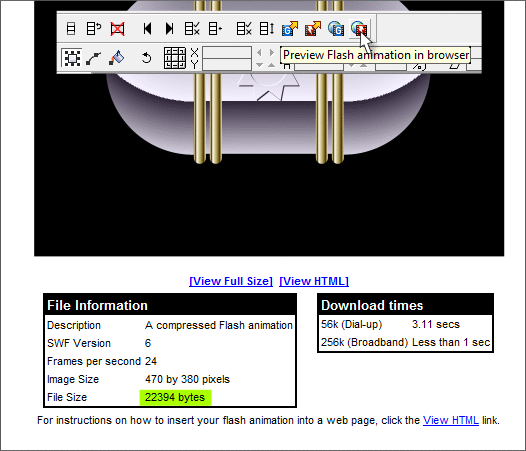
Preview Flash Animation in Browser. Note the file size. This entire animation is only 22K. This may be less for yours because as you can see on the next page , I added a few more frames. If you exported this file as a GIF animation, without the tweening effects, the size would be about 1.75 MB. That's the beauty of Flash. As long as you use vector objects and avoid bitmaps, the file size remains incredibly small. And unlike a bitmap format such as GIF, you can scale a Flash animation to any size without loss of sharpness or quality.
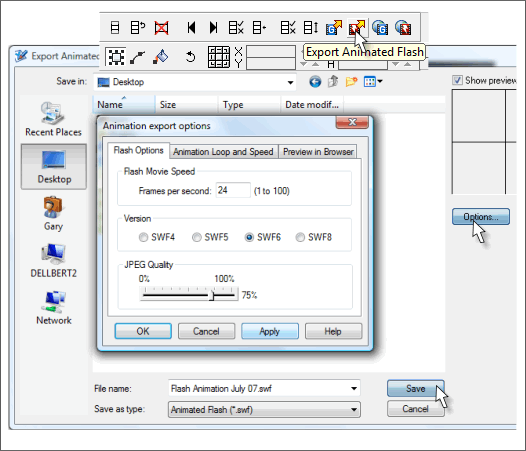
Finally, Export your Flash animation. I have shown the Options dialog but it is not necessary to change anything. Increasing the Frames Per Second will in theory make a smoother animation but the animation is pretty smooth as it is. Picking a lower SWF number will support the animation in older Flash players but you are very safe with SWF6 . And as we have no bitmap images, the JPEG Quality is a non-issue. Click OK to exit the dialog and press Save. You can see the final animation on the next page.
|
|||||||||
|
©2007 Gary W. Priester
|
|||||||||


