


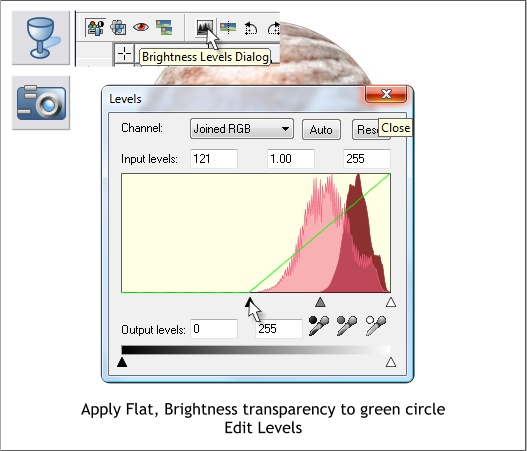
Select the green filled circle then select the Transparency Tool (F6).
Apply a Flat, 0%, Brightness transparency.
Switch to the Photo Tool (P). Click the Brightness/Levels Dialog icon on
the Infobar to open the Levels dialog. Drag the bottom left black
triangle almost half way. Close the dialog. Center the edited circle over
the marble filled circle. This gives the appearance of clouds.
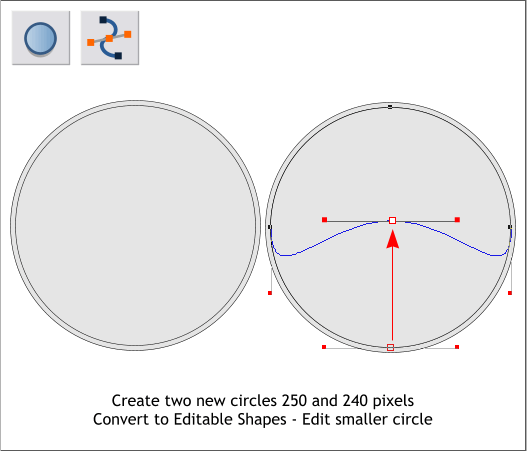
Create two new circles to the sizes shown. Select the smaller circle and
Arrange > Convert to Editable Shapes. Switch to the Shape Editor Tool
(F4). Select the bottom center control point. Press the up arrow on your
keyboard several times to nudge the control point to the position
shown.
Apply a Flat white fill to the modified circle.
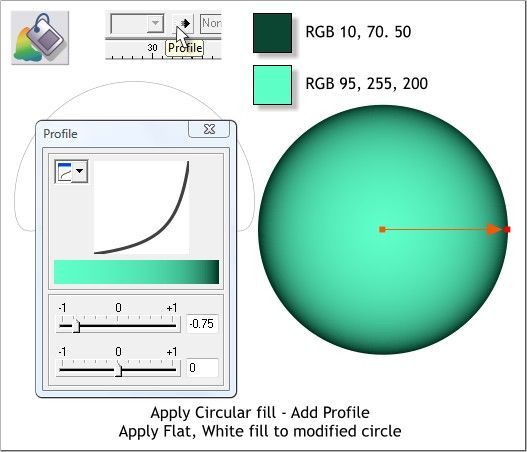
Select the large circle and apply a Circular fill using the two colors
shown. Press the Profile arrow icon on the Infobar. Move the top slider
to the left to -0.75 to extend the center of the fill outwards.


