|

Select the Rectangle Tool (M). Draw a rectangle 425 tall by 450 pixels tall. This will be the background behind the logo.
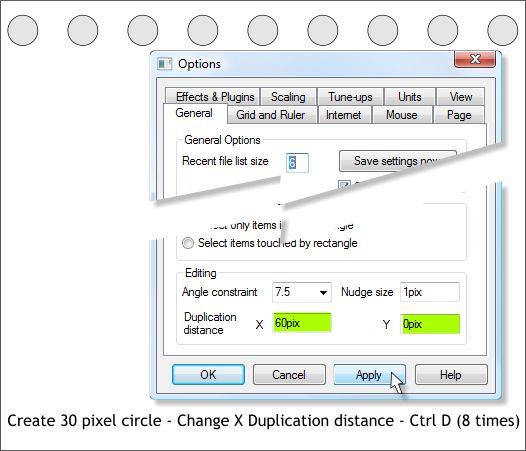
In the upper left hand corner of the rectangle, add a small 30 pixel circle (use the Ellipse Tool (L) and hold down the Ctrl key to constrain the ellipse to a circle.
Open the Page Options menu (Utilities > Options). In the General tabbed section, set the X Duplication Distance to 60pix and the Y distance to 0. Press
Apply to apply the change but to keep the menu open.
Select the circle and press Ctrl d (Duplicate) 8 times.

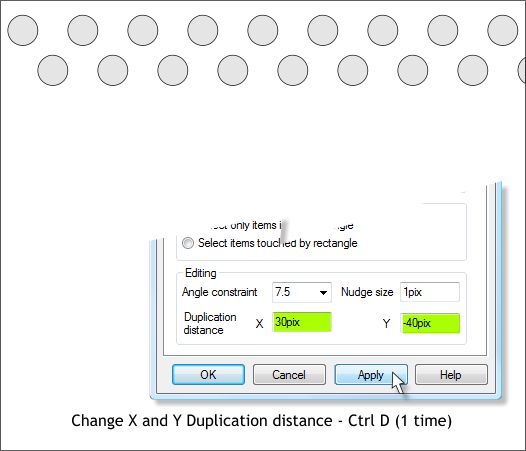
Change the X distance to 30pix and the Y distance to –40pix and press Apply.
Select the top row of circles and press Ctrl d one time.

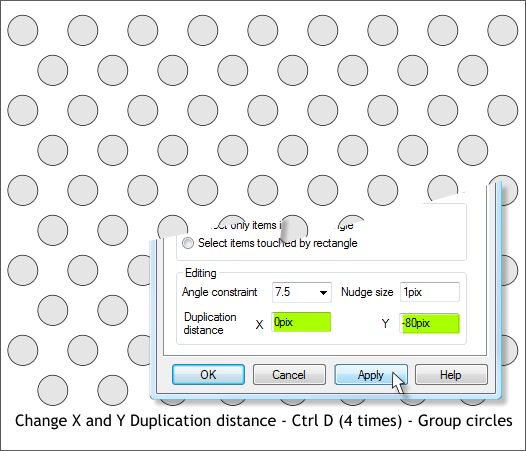
Change the X and Y distances as shown and press Apply.
Select the top two rows and press Ctrl d four times.
Select all the circles and group them Ctrl g.
Reset your X and Y Duplication Distances to their original settings, usually 20 and -20 pixels.
|