 |
 |
|||||||
| 0 1 2 3 4 5 6 7 8 9 10 11 Download Zipped Tutorial | ||||||||
|
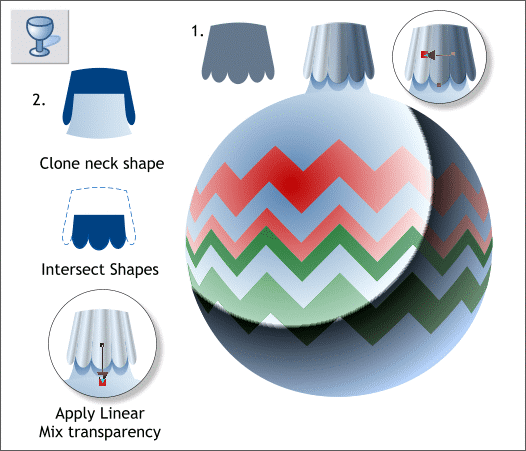
1. Place the blue-gray shape over the metal cap and apply a Linear, Stained Glass transparency. You can use the same technique as for applying a Linear fill. Click the shape with the Transparency Tool (F6) to select the shape, hold down the Ctrl key , and click and drag, in this case from right to left, to apply the Linear transparency. Select Stained Glass from the Transparency Types drop down list. 2. Clone the neck shape (Ctrl k). Place the cloned neck shape over the blue shape as shown. Select both objects and Arrange > Combine Shapes > Intersect Shapes or press Ctrl 3. Place the intersected blue shape over the neck shape. Press Shift Ctrl b a few times to move the shape beneath the metal cap shape. Apply a Linear, Mix transparency.
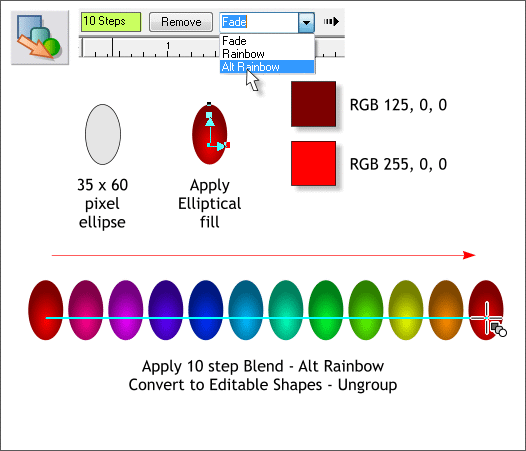
In this next step, we'll create some rainbow colored lights to reflect on the ornament. Select the Ellipse Tool (L) and create a 35 x 60 pixel ellipse. Select the Fill Tool (F5), select Elliptical from the Fill Type drop down list on the Infobar. Move the center of the fill down to the lower 1/4 of the ellipse and apply the two colors shown. Clone the ellipse (Ctrl k) and move the clone about 500 pixels to the right. Select the Blend Tool (F7). Click and drag from one ellipse to the other to create a blend. Change the number of Blend Steps on the Infobar to 10 and press Enter to apply the change. From the Color Blend Effect drop down list, select Alt Rainbow. Arrange > Convert to Editable Shapes (a blend is a live effect) and then Arrange > Ungroup or press Ctrl u.
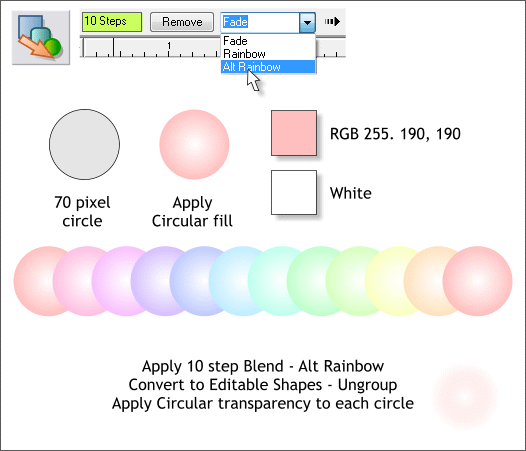
We'll do the same thing again, but with a circle this time, which we'll use to create colored flares over the colored lights.. Create a 70 pixel circle and apply a pale pink and white Circular fill. Clone the circle, move the clone to the right, and create a 10-step blend with the Alt Rainbow Color Blend Effect. Convert to Editable Shapes (Arrange menu) and then Arrange > Ungroup. One-by-one select the rainbow colored circles with the Transparency Tool (F6) and select Circular, Mix from the Transparency Shape drop down list. The result does not look like much now but will look a lot different when we place the flare and the lights over a dark background.
|
||||||||
|
|
||||||||


