 |
 |
|||||||
| 0 1 2 3 4 5 6 7 8 9 10 11 Download Zipped Tutorial | ||||||||
|
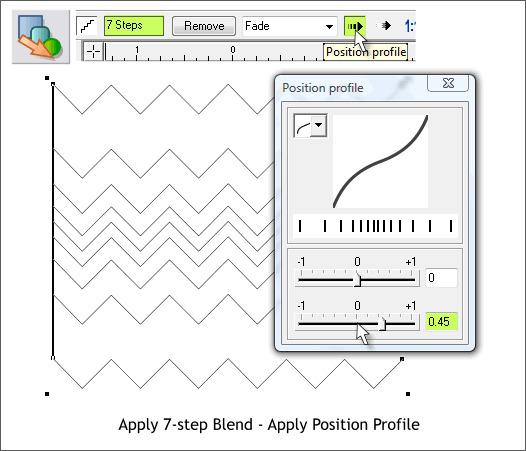
Delete the rectangle. Select the Blend Tool (F7). Click on the bottom line and without releasing the left mouse button, drag up to the top line as shown above to create a blend. Change the number of Blend Steps on the Infobar to 7 and press Enter to apply the change. Click the Position Profile arrow icon on the Infobar. Move the bottom slider to 0.45 or key in 0.45 and press Enter (or Return) to apply the change. NOTE: Any time you move a slider, the change takes place automatically. Any time you key in a change, you have to press Enter (or Return) to apply the change.
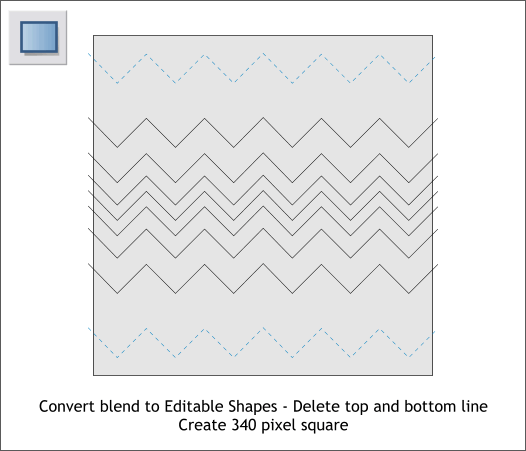
With the blended lines selected, from the Arrange menu, click Convert to Editable Shapes (Ctrl Shift s) Hold down the Ctrl key and click on the top line in the blend. Press the Delete key on your keyboard. Delete the bottom line this way as well. Select the Rectangle Tool (M). Hold down the Ctrl key (to constrain the rectangle to a square) and create a 340 pixel square. Center the lines over the square. (Arrange > Alignment > Align Centrally horizontal and vertical).
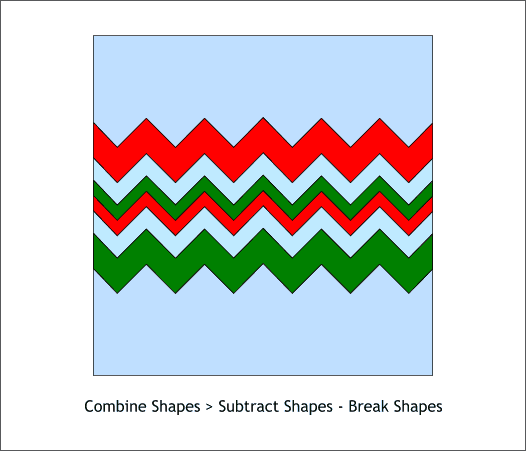
With the lines and the square selected, from the Arrange menu select Combine Shapes > Subtract Shapes or press Ctrl 2. And again from the Arrange menu, select Break Shapes. Color the shapes as shown. The exact colors do not matter as we will change them later. For now they are just for reference.
|
||||||||
|
|
||||||||


