 |
 |
|||||||
| 0 1 2 3 4 5 6 7 8 9 10 11 Download Zipped Tutorial | ||||||||
|
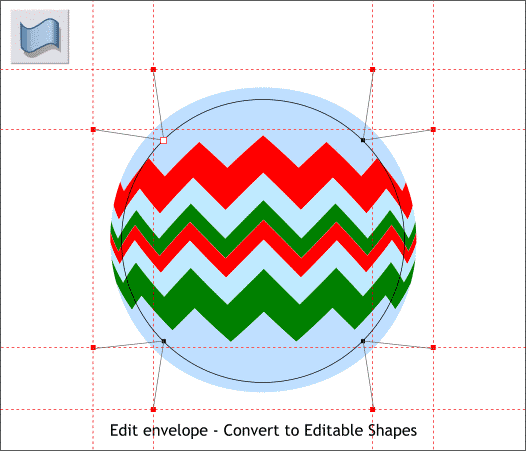
Click the top left control point on the circular envelope. Two Bezier control handles will appear. Drag the red squares on the ends and snap them to the guidelines as shown above. Repeat this step for the other three corners. Arrange > Convert to Editable Shapes (Ctrl Shift s).
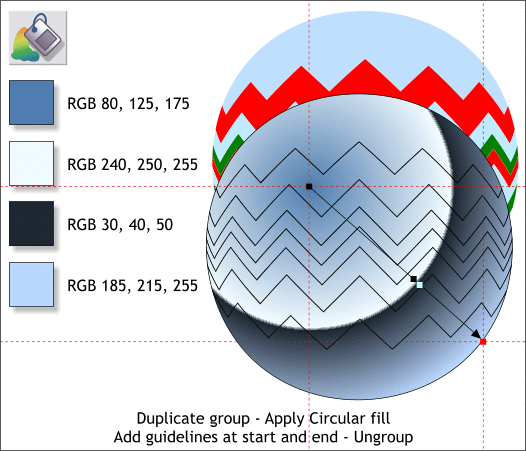
Duplicate the shapes. We will use the original to determine the color placement in the next steps. You can move yours off to the side. You have more room on your screen than I have! Select the original group and then select the Fill Tool (F5). From the drop down list of Fill Types on the Infobar, select Circular. Move the center of the fill up and left. Drag the end of the fill path arrow to the edge of the circle as shown above. Right click on the top screen ruler and select Delete All Guidelines. This is the instant way to get rid of all current guidelines. Drag four new guidelines through the start and end points of the fill as shown. We will use these to match the red and green fills in the next steps. Double click on the fill path arrow to add a new color. Double click again to add a second color. Move these two color squares close together. Apply the four RGB colors shown with the Color Editor (Ctrl e). Arrange > Ungroup.
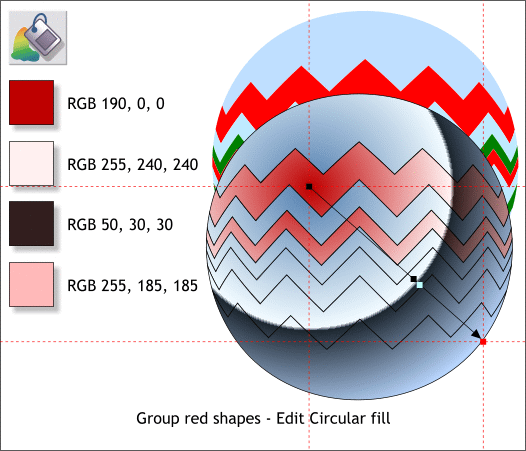
Select the two objects for the red shapes and group them (Ctrl g). Select the Fill Tool (F5). Match the start and end points on the fill path arrows as shown and change the colors. NOTE: If suddenly you have a really weird Elliptical fill, select Circular from the Fill Types drop down list on the Infobar and readjust the fill path arrow to the guidelines. Save your drawing and take a short break.
|
||||||||
|
|
||||||||


