 |
 |
|||||||
| 0 1 2 3 4 5 6 7 8 9 10 11 Download Zipped Tutorial | ||||||||
|
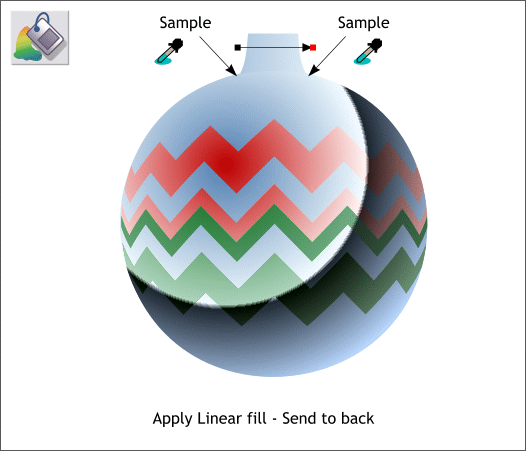
Apply a Linear fill to the neck shape. Use the Color Picker (the eyedropper tool) in the Color Editor (Ctrl e) to sample the colors from the circle as noted above. (Click on one of the squares on the fill path arrow to select it, then drag the color picker eyedropper over the corresponding part of the circle. Repeat for the other end. Select both the neck and the silver circle and send them to the back (Ctrl b or Arrange > Put to Back).
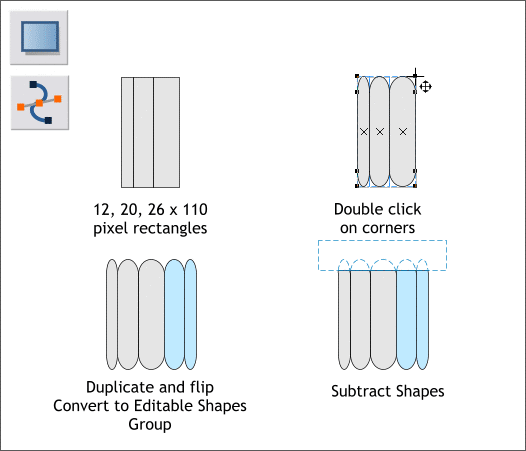
Next we'll make the metal thing that goes over the neck of the ornament. Using the Rectangle Tool (M), create three rectangles to the sizes shown above left. Double click the corners with the Rectangle Tool to create curved corners. Duplicate the first two rectangles and move them to the right of the center rectangle with the thinner duplicate at the far right. Select and group the five rectangles (Ctrl g). Draw a rectangle a bit wider than the group and place it over the top of the group as shown above, bottom right. Select the rectangle and the group and Arrange > Combine Shapes > Subtract Shapes or press Ctrl 2. This squares off the tops and leave the bottom of the rectangles curved.
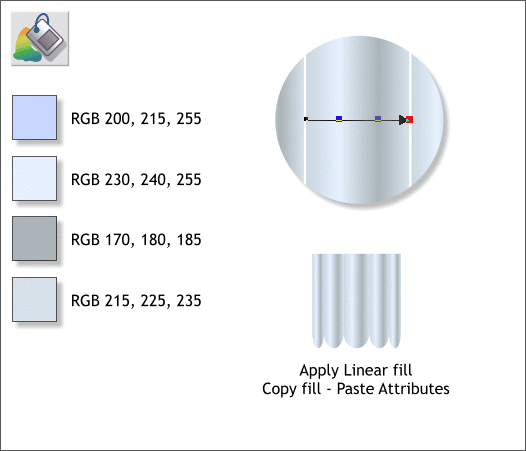
Ungroup the rectangles (Ctrl u). Apply a Linear fill to the largest rectangle with the Fill Tool (F5) using the colors shown above. Zoom in close for more control. TIP: The quick way to apply a Linear fill is click the shape to be filled with the Fill Tool to select the shape, hold down the Ctrl key to constrain the direction of the fill, and drag to the right (or left). Double click the fill path arrow to add new colors. Copy the filled rectangle to the clipboard (Ctrl c). Select the other rectangles and Edit > Paste Attributes or press Ctrl Shift a. This applies the same Linear fill to the other selected objects. Save your drawing and take a short break.
|
||||||||
|
|
||||||||


