 |
 |
|||||||
| 0 1 2 3 4 5 6 7 8 9 10 11 Download Zipped Tutorial | ||||||||
|
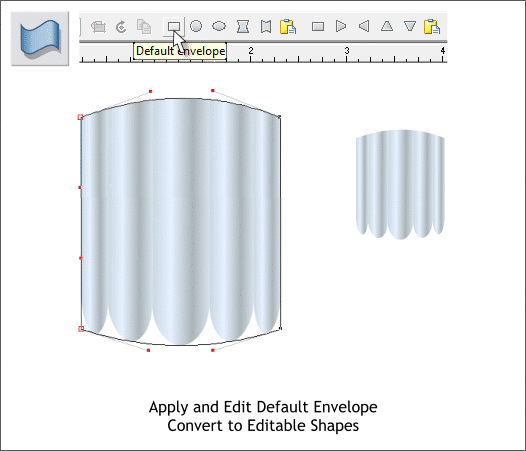
Hold down the Shift key (to select multiple objects) and click on each of the filed shapes. You can also drag a selection rectangle (marquee) around all the objects with the Selector Tool (the arrow pointer). Switch to the Mold Tool (Shift F6). Click the Default Envelope icon on the Infobar. Click on the corners to enable the Bezier control handles and drag the small red squares as shown above. Just enough to round the top and the bottom. Arrange > Convert to Editable Shapes. NOTE: Several times in this tutorial after applying an effect, such as an envelope, I have instructed you to convert to editable shapes. Here's why. An envelope is a "live effect". Live effects can be edited at any time. Even if you save the file and open it two years from now. The way to turn off the live effect so we can apply another effect, is to Convert to Editable Shapes.
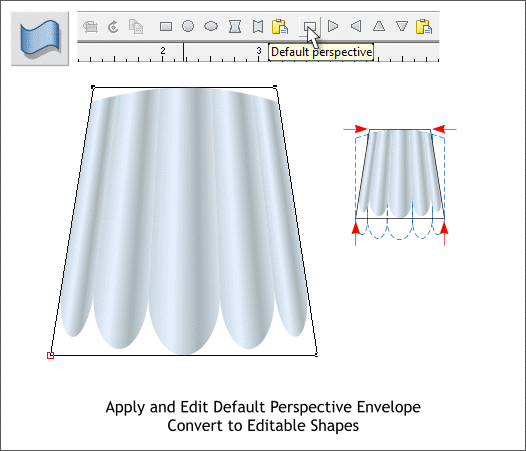
Apply a Default Perspective envelope. Move the top corners towards the center a small distance. Move the bottom two control points (one at a time) upwards as shown on the right. Zoom in tight when you do these edits. Guidelines will help ensure that both sides are the same. Arrange > Convert to Editable Shapes.
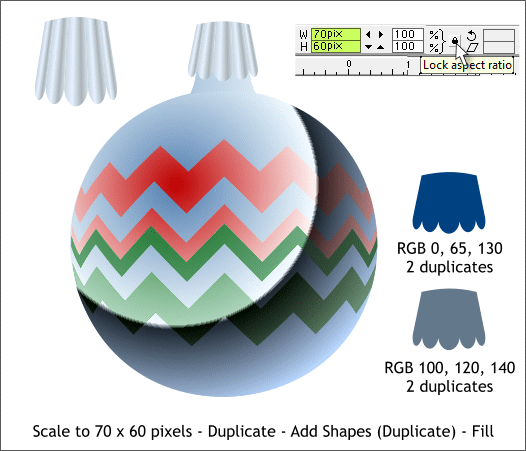
We still need to resize the top thing. Click the black padlock icon (Lock Aspect Ratio) so it is in the raised position (non-proportional scaling). In the Height and Width text entry boxes, enter 70pix and 60pix and press Enter to apply the changes. Click the black padlock icon again to enable proportional scaling. Make a duplicate of the metal shape (Ctrl d). From the Arrange menu, select Combine Shapes > Add Shapes or press Ctrl 1. Make another duplicate of the shape and apply the two Flat fills shown above right.
|
||||||||
|
|
||||||||


