


 Made some duplicates of the dark blends so you have about 14 dark
blends in all. For this step, we will work with the dark blends and the
taller lines. Select the Blend Tool (w). Select one blend, then select
one of the lines. (The Fit Blend to Curve option on the Infobar will now
be enabled). Click the Fit Blend to Curve icon. Repeat for the other
blends and lines. These will be the back row of fries.
NOTE: I have made some of the fries shorter or taller to get more
variety of height. Select a blend and drag the top center control
point up or down to vary the height.
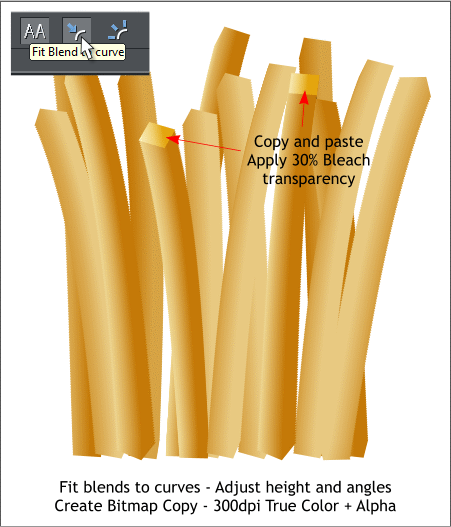
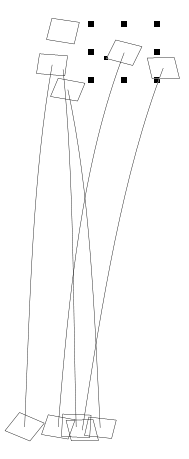
After you have done this, randomly select some of the top end blend
shapes (Hold down the Ctrl key and click at the end of the blend. It
might be easier to switch to Outline View (Window > Quality >
Outlines). Then copy and Edit > Paste in Place.
Marquee select all of the darker fries and from the Arrange menu,
select Create Bitmap Copy. Use the True Color + Alpha option and
increase the Bitmap Resolution to 300dpi. Press Create.
Made some duplicates of the dark blends so you have about 14 dark
blends in all. For this step, we will work with the dark blends and the
taller lines. Select the Blend Tool (w). Select one blend, then select
one of the lines. (The Fit Blend to Curve option on the Infobar will now
be enabled). Click the Fit Blend to Curve icon. Repeat for the other
blends and lines. These will be the back row of fries.
NOTE: I have made some of the fries shorter or taller to get more
variety of height. Select a blend and drag the top center control
point up or down to vary the height.
After you have done this, randomly select some of the top end blend
shapes (Hold down the Ctrl key and click at the end of the blend. It
might be easier to switch to Outline View (Window > Quality >
Outlines). Then copy and Edit > Paste in Place.
Marquee select all of the darker fries and from the Arrange menu,
select Create Bitmap Copy. Use the True Color + Alpha option and
increase the Bitmap Resolution to 300dpi. Press Create.
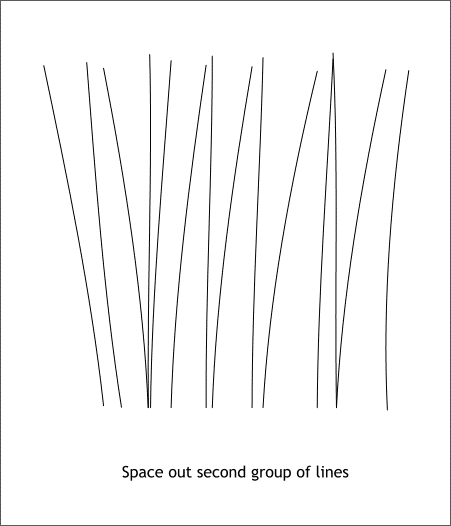
 Randomly space out the second set of shorter lines.
Make some duplicates of the lighter blends and attach them to the
random lines. Make some taller and some shorter.
Again, randomly select some of the top end blend shapes (Hold down
the Ctrl key and click at the end of the blend. It might be easier to
switch to Outline View (Window > Quality > Outlines). Then copy and
Edit > Paste in Place.
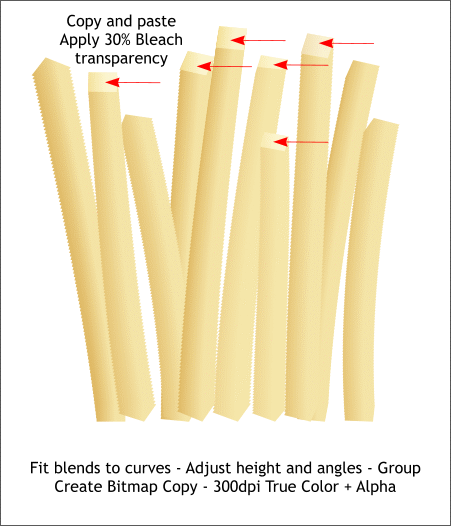
Hold down the Shift key and click on each of these duplicates. Switch
to the Transparency Tool (F6). From the drop down list of
Transparency Types on the Infobar, select Bleach. Move the
Transparency slider to 30%.
This creates some lighter colored tops for some of the lighter fries.
Marquee select all of the lighter fries and from the Arrange menu,
select Create Bitmap Copy. Use the True Color + Alpha option and
increase the Bitmap Resolution to 300dpi. Press Create.
Randomly space out the second set of shorter lines.
Make some duplicates of the lighter blends and attach them to the
random lines. Make some taller and some shorter.
Again, randomly select some of the top end blend shapes (Hold down
the Ctrl key and click at the end of the blend. It might be easier to
switch to Outline View (Window > Quality > Outlines). Then copy and
Edit > Paste in Place.
Hold down the Shift key and click on each of these duplicates. Switch
to the Transparency Tool (F6). From the drop down list of
Transparency Types on the Infobar, select Bleach. Move the
Transparency slider to 30%.
This creates some lighter colored tops for some of the lighter fries.
Marquee select all of the lighter fries and from the Arrange menu,
select Create Bitmap Copy. Use the True Color + Alpha option and
increase the Bitmap Resolution to 300dpi. Press Create.
 Drag
control point
to make taller
or shorter
Drag
control point
to make taller
or shorter
 Ctrl click in Outline View
to select a blend object.
Ctrl click in Outline View
to select a blend object.


