
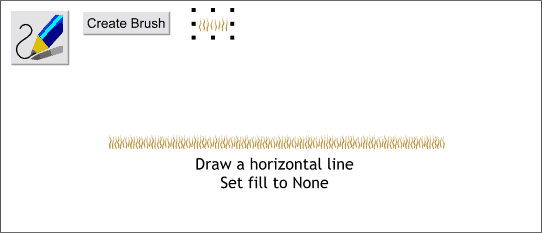
Now that we have our fibers we can create a brush. Marquee select all the fiber shapes. Select the Freehand and Brush Tool then press the Create Brush button on the Infobar. Name your brush and press OK.
NOTE: Do not group the strokes. Xara will create a brush alternating the individual shapes which is what we want.
Using the Freehand and Brush Tool, draw a horizontal line. The new brush stroke will be applied to the line as shown above. Click the left mouse button on the cross hatched box to the left of the screen palette to set the fill to none. (Lines should not have a fill, but for reasons best known to Xara, they do).
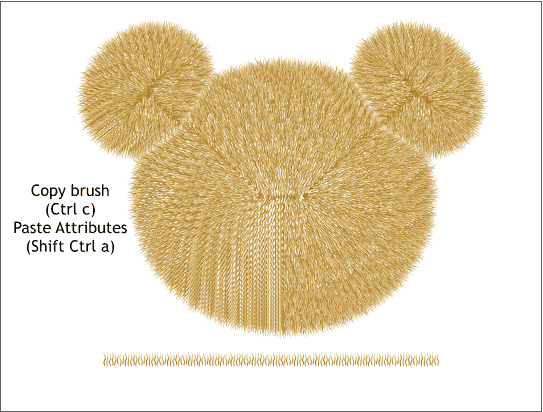
Select the brush stroked line and Copy it to the clipboard (Ctrl c).
Select the contour and from the Arrange menu, select Convert to Editable Shapes. With the contour still selected, select Ungroup (Arrange menu).
Using the Selector Tool, marquee select all the shapes in the contour and from the Edit menu, select Paste Attributes (or press Shift Ctrl a). The series of shapes should now look like the example above.
Because each contour ring has the same brush stroke, some unfortunate and distracting patterns have occurred. We will fix this in the next step.
If you have not already done so, save your work and take a short break to rest your eyes. Looking at the screen for long periods of time is not good for your eyes. Especially if you are one of us older folks!
|
|
|
|
|
|
|
|
|
|
|
|