
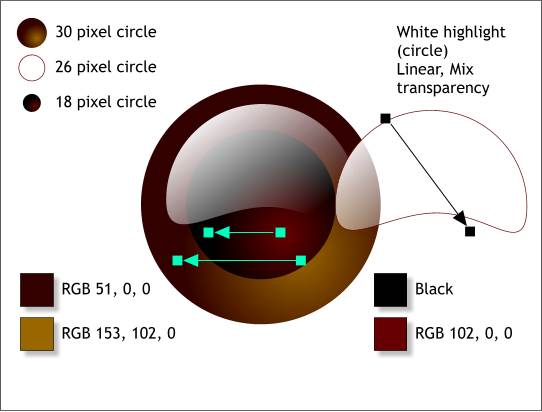
We are down the the final details. For the glass eyes create three circles to the sizes shown top left. Apply the two circular fills for the eye and the pupil.
Convert the white filled 26 pixel circle to editable shapes. Using the Shape Editor Tool, drag the bottom center control point upwards creating the white shape shown on the right. Apply a Linear, Mix transparency by selecting the shape with the Transparency Tool, then dragging from the top left downwards and a little beyond the end of the shape. This adds a nice glassy highlight to the eye.

Finally we need a mouth and nose. Using the Shape Editor Tool make a J-shape about 40 pixels tall. Also make a short shape that goes in the opposite direction of the bottom of the J-shape. Select both lines and then open the Line Gallery. Select Round Join and Round Cap from the drop down lists. Open the Dash Patterns folder. Click the dashed line in the top position in the second column and press Apply. Highlight the line width size and change the value to 3pt. Press Apply.
Convert the two lines to shapes (Arrange menu). Then Combine Shapes... Add Shapes. Apply a Rounded, Inner Bevel to give the appearance of yarn stitching.
Using the QuickShapes Tool (just below the Ellipse Tool on the main toolbar), draw a 3-sided triangle about 40 pixels wide by 25 pixels tall. Press the Curved Corners icon on the Infobar (or double click on one of the ends with the QuickShapes Tool.
Apply an Inner Bevel to the specifications shown above.
Save your work and take a short break. We are almost done.
|
|
|
|
|
|
|
|
|
|
|
|