
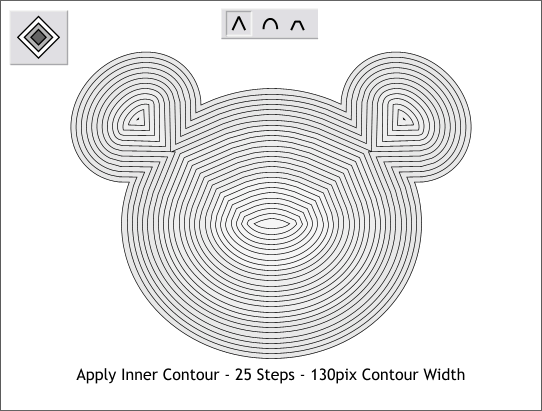
Select the Contour Tool then click on the outline to select it. Drag any of the red arrows towards the center of the shape to create an Inner Contour. Change the number of Contour Steps to 25 and press Enter to apply the change. Move the Contour Width slider to 130 or enter the number in the text entry box and press Enter to apply the change. Press the Miter Join icon (the one that looks like an upside down V).
If you are new to Xara and/or the Contour Tool, press all three Corner Join icons to see the difference each makes on the contour.
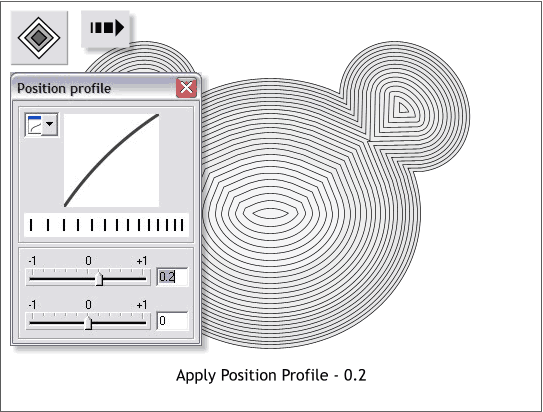
By applying a Profile setting to the contour we can achieve a more 3D contour shape. With the contour and the Contour Tool still selected, press the left of the two arrow icons on the Infobar (these are the Profile icons) to open the Position Profile dialog (shown above).
Move the top slider to the right a little until the amount shown is 0.2. The contour rings will automatically readjust to the new setting.
Again, if you are new to Xara and to Profiles, move the sliders around to get an idea how they effect the contour. Xara has contour options for many of its tools and they all work in much the same way. There are also 4 preset profiles in the drop down list. Select these and see what they do before finally setting the top slider as indicated.
|
|
|
|
|
|
|
|
|
|
|
|