Locate the gray outline shape that
we created ages ago and which I think I told you to make a duplicate.Select the new Bevel Tool and then select the gray outline shape with the Bevel Tool. Several of Xara X's
new tools may be used to select objects and the Bevel Tool is one.
A series of red arrows will appear around the shape, which let you drag in either direction to determine the depth of the bevel. We won't
use these.
Instead, select Flat from the Bevel Type drop down list on the Infobar. Change the Depth to 3pix. From the drop down list of Slider Types, select Light Elevation
and move the slider to 60%. Select the Inner Bevel icon on the Infobar to apply the bevel effect on the inside of the shape. You can see the result of the effect in the enlarged section.


 Locate the gray outline shape that
we created ages ago and which I think I told you to make a duplicate.
Locate the gray outline shape that
we created ages ago and which I think I told you to make a duplicate.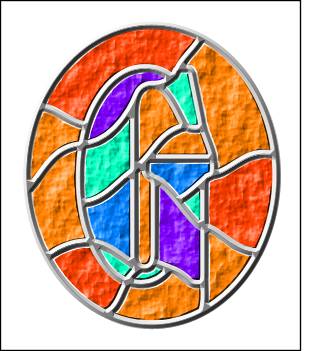 Position the beveled shape over the glass portion.