 |
 |
||||||
| 0 1 2 3 4 5 6 7 8 9 10 11 Download Zipped Tutorial | |||||||
|
If you have gotten this far, congratulations. We're almost done. Actually, I am already done.
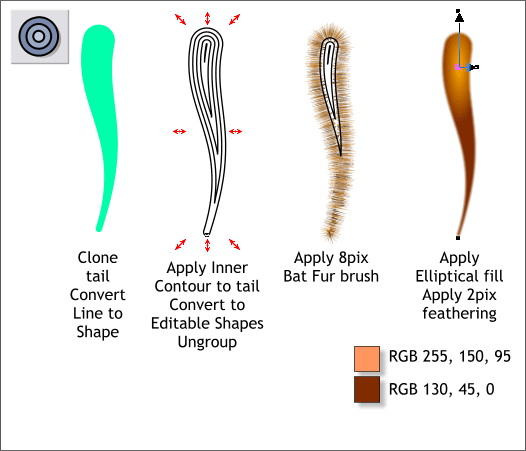
Select the tail. I can't remember if we converted the line to shape. If when you select the tail the Status Bar reads 1 Line on Layer 1 then Arrange > Convert Line to Shape. If it reads 1 Shape on Layer 1, then we're OK. Clone the tail. Add a black outline and set the fill to none. Apply an Inner Contour. Arrange > Convert to Editable Shapes and then Arrange > Ungroup. Open the Line Gallery (F12). And apply the three Fur brushes. But change the line Width to 8pix. TIP: In the Line Gallery > New Brush Strokes folder, set the line Width to 8pix first, then apply the fur brush. Apply an Elliptical fill to the cloned tail then add 2pix feathering.
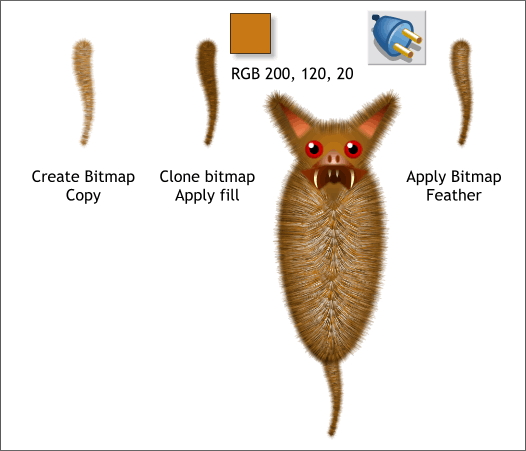
Send the elliptical-filled tail to the back of the fur tail. Select both and Create Bitmap Copy... (Arrange menu). Use the True Color + Alpha color depth and increase the Bitmap Resolution to 200dpi. Press Create. You can delete the vector tail or move it off to the side. We'll work with the bitmap. Clone the bitmap tail and apply the fill color shown above using the Color Editor (Ctrl e). Select the darker fur and send it behind the lighter bitmap and center the two (Arrange > Alignment). Select the lighter fur then select the Live Effects Tool (Ctrl F5). Press New > on the Infobar and select Bitmap Feathering. Thanks again Phil! Great tip. Group both bitmap tails (Ctrl g) and send them to the back of the bat.
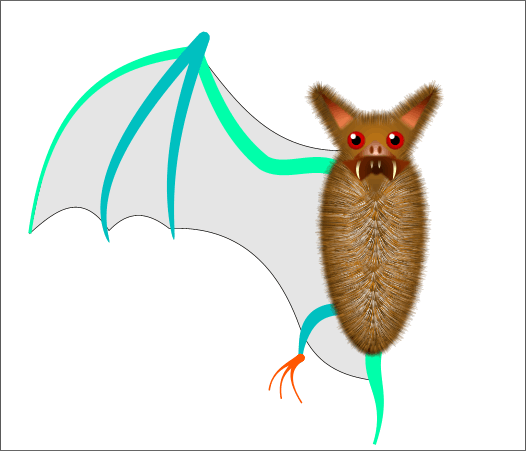
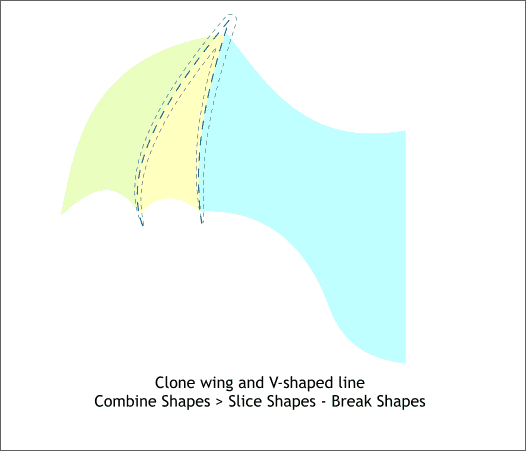
Clone the wing and the V-shape. Switch to Outline view (Window > Quality > Outline) and make sure the line passes through the points on the bottom of the wing. Switch back to Antialiased view. Select the V-shape and the wing and Arrange > Combine Shapes > Slice Shapes or press the keyboard shortcut, Ctrl 4. Then Arrange > Break Shapes. Save your drawing and take a short break. You might want to put the Champagne in a bucket of ice to celebrate when you are finished.
|
|||||||
|
|
|||||||


