 |
 |
||||||
| 0 1 2 3 4 5 6 7 8 9 10 11 Download Zipped Tutorial | |||||||
|
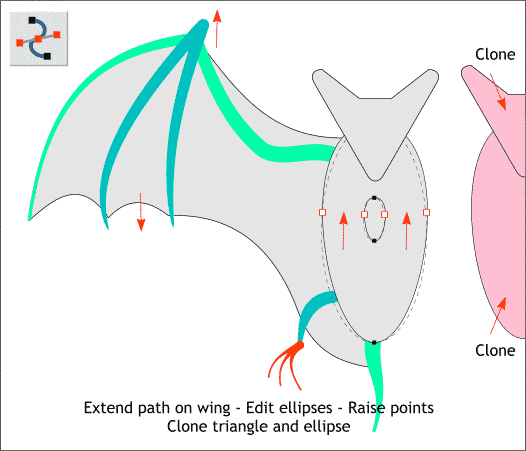
Select the two ellipses then switch to the Shape Editor Tool. Select the left and right middle control points and move them upwards as shown. This adds a bit of shoulder to the ellipse. Clone (Ctrl k) the head and the large ellipse and set these two shapes aside for later.
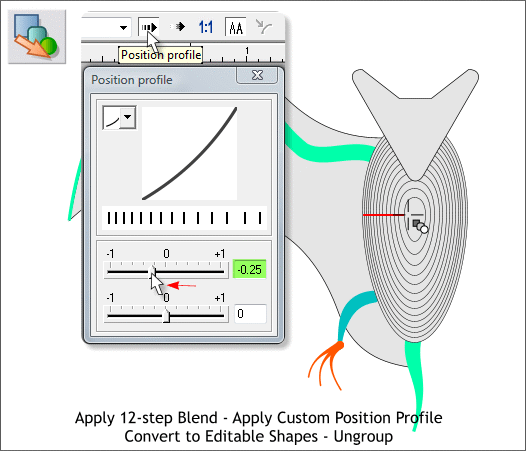
Hold down the Shift key (to select multiple objects) and click on the two ellipses. Switch to the Blend Tool (F7). Click on the larger ellipse and drag to the smaller ellipse to apply a blend. Change the number of Blend Steps on the Infobar from 5 to 12. Press Enter to apply the change. Click the Position Profile arrow icon on the Infobar. Move the top slider to —0.25 or key in this figure and press Enter. This causes the outer rings to be closer together than the center rings and adds shape. With the blend selected, from the Arrange menu, select Convert to Editable Shapes, then Arrange > Ungroup.
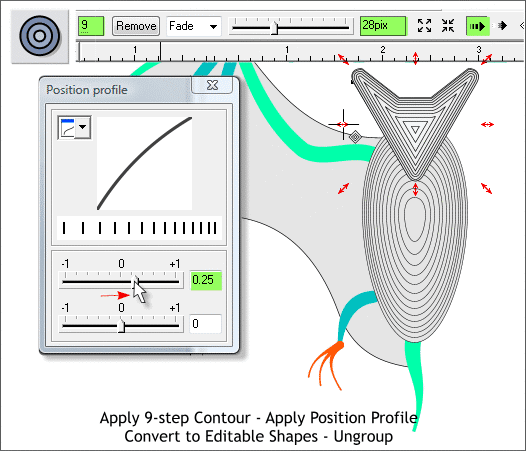
Select the head then select the Contour Tool (Ctrl F7). Drag any of the red arrow control handles towards the center to apply an Inner Contour. Change the number of Contour Steps to 9 and press Enter. Change the Contour Width slider setting to 28pix. NOTE: Any time you manually key in a number in a text entry box, you must press Enter (or Return) to apply the change. Any time you change a setting using a slider, the change is automatically applied. Press the Position Profile arrow icon and change the top slider setting to +0.25. From the Arrange menu, select Convert to Editable Shapes then Arrange > Ungroup. The body drawing is now complete.
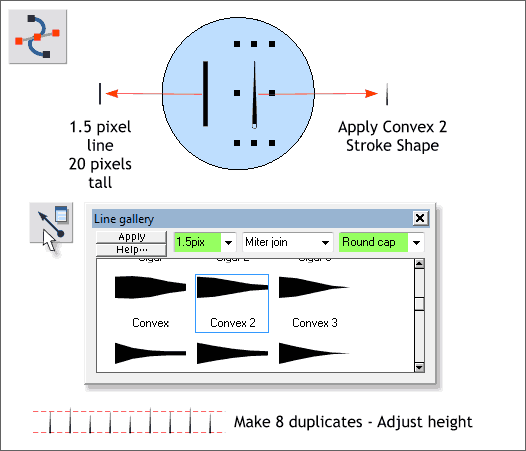
Select the Shape Editor Tool. Zoom in to about 300%. (In versions 3.2 just press 3 to zoom to 300%. Press 1 to return to 100%). Draw a very short line about 20 pixels tall. (Click on the page, hold down the Ctrl key, then click and drag upwards to create a vertical line). In the Width text entry box on the Infobar, key in 1.5 and press Enter. Open the Line Gallery (F12). Apply a Convex 2 stroke shape. Select the Round Cap option. The pointed end of the line should face upwards. Make 8 duplicate lines (Ctrl d) and adjust the heights to that all lines are slightly different in height. Versions 3.2 TIP: Drag any object with the right mouse button. Release the right mouse button to drop a duplicate. The object remains selected so you can quickly drag and duplicate any selection.
|
|||||||
|
|
|||||||


